Swarm Cell!

DSC_0004.JPG

I’ve been checking my hives on a weekly basis to try to head off potential swarming. Looks like I was right on time!

This is the first swarm cell I’ve seen in any of my three hives, and I only found the one. I immediately removed the frame it was attached to and put it into its own nuc box along with a frame of pollen, a frame of honey, two empty frames and some extra nurse bees.

The nuc was set up in a new location with a pollen patty and sugar syrup feeder and I anxiously anticipate what develops. The hard part now is keeping my paws out of it for a week or two while they get themselves settled. Here’s hoping for a a well-mated queen and the beginnings of a healthy new hive.

DSC_0007.JPG

First Powdered Sugar Varroa Treatment a Great Success!

DSC_0035.JPG

I opened up my hives today and was chagrined to see that Hive 1 had some bees with wing and abdomen abnormalities due to varroa mite infestation. My other two hives also have mites but seem to be chugging along for now. I finally saw the queen of Hive 1 as well, which was excellent, but it was obvious that something needed to be done.

DSC_0025.JPG

Deformed bee

DSC_0022.JPG

Hive 1 queen

I’ve done scads of research online on the efficacy of the powdered sugar treatment. Some people say it works, some people say it’s a waste of time. The theory is that the sugar is just the right size to get under the mites’ feet and unstick them from the bees as they groom it off each other. It won’t do anything for the mites inside the cells, but you can treat multiple times to get them once they emerge. For instance, once a week for three weeks. I decided I had nothing to lose, so I installed my new DIY screened bottom board and got out a cup of icing sugar.

DSC_0038.JPG

At least this treatment is easy to apply! I dumped the cup of sugar on the top brood box and brushed it in between all the frames. I soon had a bunch of very white, very pissed off bees.

DSC_0045.JPG

Then I closed it up and waited. But not for long… Less than an hour later I had to check and see the results, if any. I pulled out the tray and my jaw absolutely dropped.

DSC_0002.JPG

It was totally loaded with mites! I counted probably around 600 mites and after I waited another couple of hours there were easily 1000 mites on the tray, struggling in the sugar. That is a LOT of phoretic varroa.

I am SO glad that I decided to do this treatment. I immediately got to work making two more screened bottom boards for my other hives and they will be getting treated as soon as possible. I plan to give them all a weekly treatment for at least three weeks or until the mite drop is significantly lowered. I’m so glad that I didn’t have to resort to any harsh chemicals and I’m incredibly impressed with how this simple trick has worked.

DIY Convertible Screened/Solid Bottom Board

DSC_0004.JPG

I mentioned in the previous post how I didn’t really like the screened bottom board options available to me locally, not to mention the fact that they were all very expensive. All the designs I saw online seemed overly complicated or had what I perceived as flaws.

I have a lot of raw cedar boards left over from fencing my yard, and I figured this was a great way to use some of them up. Not to mention this is a very simple design that doesn’t require any rabbets.

DSC_0002.JPG

Solid bottom board base

I had seen a bottom board similar to this on the University of Guelph’s beekeeping videos on Youtube, but couldn’t find instructions to build them anywhere. It’s a two-part design that can be used either as a solid bottom board, or as a screened bottom board with mite collection tray. My design is a little bit different from theirs as I’ve incorporated a small landing strip. It’s not necessary for the bees but I like the look of it.

The unit consists of a simple solid bottom board made from two 1 by 2 by 21 1/4″ rails and a 1 by 2 by 14 5/8″ back rail. (These are all exact dimensions, I’m not using dimensional lumber for this.) I used 3/4″ thick boards for the base but you could also use plywood. It’s assembled with screws, nails and glue. The two inch entrance is a bit large, but it can be made smaller with an entrance reducer. The reason I kept it at two inches, is that I’ve read you get a better mite kill if they fall at least two inches down.

DSC_0007.JPG

Screened top piece

The second piece is a separate screened insert made from two 1 by 1 by 21 1/4″ rails and two 1 by 1 by 16 5/8″ rails, with a piece of 15 3/4″ by 21 3/8″ hardware cloth stapled to it (also known as #8 or 1/8″ galvanized or stainless steel mesh). I stapled the mesh to the long sides and back first, then screwed on the “landing porch” rail and stapled the mesh down well along the lip. If you go over the mesh edge and staples well with a hammer it presses it down into the wood giving you a relatively smooth entry point.

DSC_0006.JPG

Back view with screen installed and quality control crew

The genius of this design is that to use it as a screened bottom board, you simply turn the solid board around and place the screen on top. The old solid board entrance now becomes the back where you can insert your mite board or oil pan. Since the wood edges are all flush, there’s no lip under the mesh for the mites to land on and crawl back up, an issue I’ve noticed with a lot of other designs.

I will most likely use recycled plastic core-flute (coroplast) for my mite boards, and screw another piece of cedar to the edge of them to cover most of the back opening and serve as a removal handle. The large two inch space would allow you to fit a large metal roasting pan underneath filled with oil if desired. You don’t want to leave the two inch gap at the back wide open as bees have been known to build mini-hives under the screen in that space! You’ll also want to make sure the unit sits on some kind of stand so the flat bottom board is not in direct contact with the ground where it can wick up moisture.

I really like the versatility and simplicity of this design, and I love that I’m only really paying for the cost of the mesh and hardware. I finish the bases off with a few coats of tung oil and they’re ready to install!

DSC_0001.JPG

With screened board installed

DSC_0003.JPG

DSC_0004.JPG

With screen removed

First Pollen of the Season

DSC_0064.JPG

The snow is finally all gone and each of my three hives are busy with housekeeping. When I looked in on them today I saw many dead bees being dragged out and amazingly, I saw bees loaded with pale yellow pollen coming in!

DSC_0087.JPG

I haven’t seen any flowers blooming anywhere yet except for the snowdrops, so perhaps they are harvesting those. I haven’t noticed a single bee visiting the snowdrops on my property though, even though we have a fair amount. At any rate, it was a very cheerful sight!

DSC_0073.JPG

There was lots of activity in all three hives and lots of fuzzy new bees. You can tell young bees by how fuzzy they are as the older they get the more bald they look. One new little bee took a break on my hand to warm up and groom herself a bit before returning to work. Did you know the first job a bee has is cleaning out the cell she has just emerged from?

DSC_0080.JPG


The Bees are Still Alive!

DSC_0062.JPG

It’s official, all three of my colonies are still alive!

DSC_0059.JPG

We’ve had a very cold winter for our area, and I wasn’t sure what to expect since this is my first overwintering with bees. So far things have been pretty shut down buzzwise with no activity at all and a lot of dead bees outside the entrances. Today was the first warm sunny day we’ve had in weeks and to my great happiness I noticed bees flowing in and out of all three hives.

DSC_0057.jpg

Some of my hive parts are a little worse for wear with all the moisture we’ve had and will likely have to be replaced in spring. All that really matters though is that there seems to be good numbers of girls busy cleaning out bee bodies, going on cleansing flights and generally looking very healthy indeed.

DSC_0065.JPG

Winter isn’t actually over yet, but I’m optimistic all my hives will be around come springtime when they will hopefully swarm, and I will hopefully catch those swarms!


Hive Inspection: Differences

DSC_0001.JPG

Cracked open my three hives today, and I’m beginning to see some real differences between them.

DSC_0002.JPGDSC_0040.JPG

Hive 1 (far left), which was started from a nuc in May, has two deep brood boxes and a honey super. I’m switching to foundationless frames and all the uppermost supers have them, so while they still haven’t touched their honey super, they have absolutely filled their top deep with capped honey. I could barely lift out the frames!

DSC_0036.JPG

This hive is always super active with lots of new bees doing their orientation flights each day, so I didn’t look into the bottom box. I probably will check it in a week or so just to make sure they’re not honey-bound. I fed this hive for quite awhile so I won’t be harvesting honey from them this year, but there’s still time to make more bees. I’ve also noticed that this hive really likes to propolize! It’s like a sticky orange wonderland in there.

DSC_0020.JPG

Hive 2 (middle) seems to be doing the best of all the hives. It was the half of the split I did in May that had the queen in it, so they’ve been going strong since the beginning. They haven’t touched their topmost super either, but they have already filled the one below it. When I looked at it I saw lots of capped honey but also a small amount of open and capped brood.

DSC_0025.JPG

I don’t mind a bit of brood in the honey super as I won’t be harvesting from this hive either this year, since they were also fed for a short time. Eventually I plan to move to all medium boxes so anything they want to do is fine, it can always be moved. Despite all the brood, strangely this hive is the one where there is not a whole lot of entrance activity on most days.

DSC_0026.JPG

Hive 3 (far right) is the half of the split that made their own queen. They’re still doing just fine and have two supers full of honey now, although the top box is still undrawn as with the other hives. I did notice this hive is slightly more defensive. There were more bees flying and I actually received a sting on the back when I mowed in front of it yesterday. Just a subtle difference really but interesting to note. I wonder if the queen found some feral bees to mate with which might explain it?

DSC_0010.JPG

Today I came prepared with a bottle full of sugar syrup to spray on the frames of all the untouched top supers. Hopefully once they start to clean it up they’ll be inspired to start drawing out comb. They’re all certainly running out of room and the pollen and nectar keep flowing in.

DSC_0032.JPG

One of my reasons for switching to foundationless frames is that I want to breed smaller bees. Bees will grow to the size of the cell they develop in. Natural cell size is about 4.6mm to 4.9mm, while over the years we’ve moved them up to a standardized 5.4mm. That’s the size of most of the foundation you’ll find commercially available. We did this because bigger bees have longer tongues that can access deeper flowers, and they can collect more nectar and pollen. However, varroa mites like bigger bees too because they take longer to gestate, which is how the mites reproduce.

If you let the bees draw their own comb, eventually after a few generations they will revert back to natural cell size. This will give them an added advantage over varroa. Since treatment free beekeeping is my objective, this will help us get there.

DSC_0013.JPG

Hive Inspection: Our First Honey!

DSC_0016.JPG

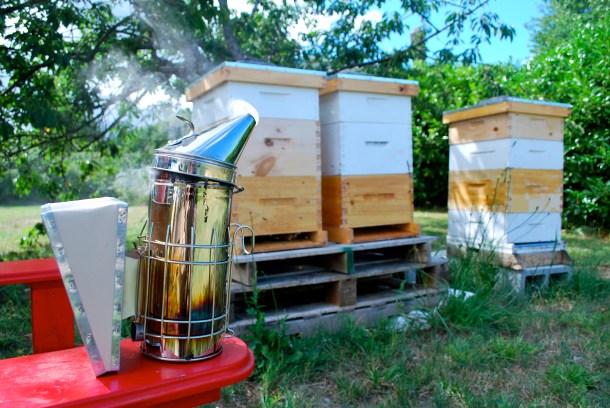
Decided to open the hives up today and see if anybody needed a new honey super. It’s hard to believe I’ve only had my bees for two months, it sort of feels like I’ve always had them. They are so fascinating to observe and learn about.

DSC_0030.JPG

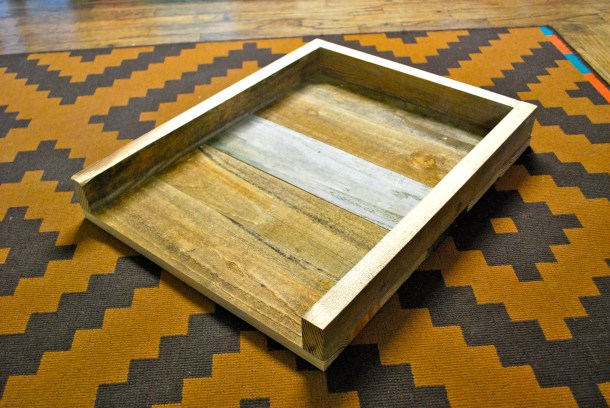
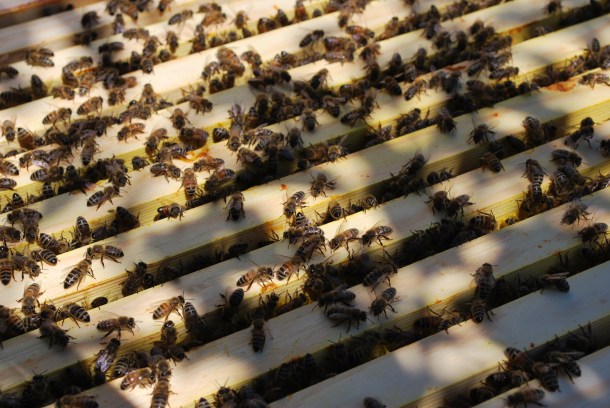
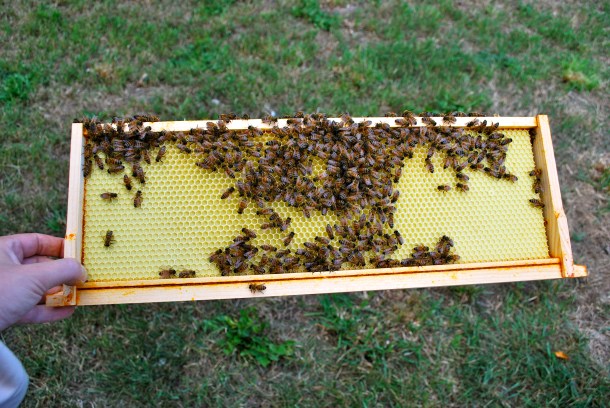
First up was the hive I started from a nuc in May. They got a new honey super last week with mixed plastic foundation and wax starter strips. I was hopeful they had done something in there during that time, anything, but they haven’t touched it.

DSC_0034.JPG

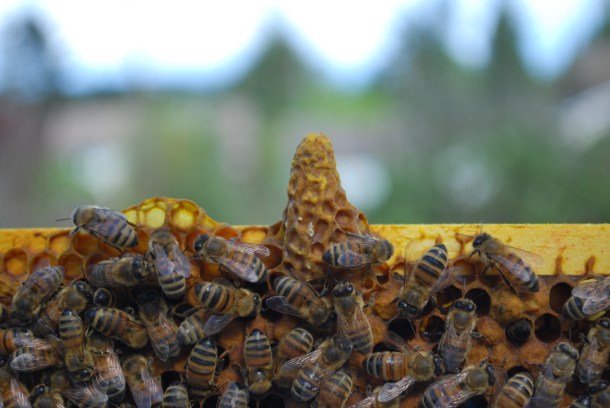
I didn’t want to disturb them too much but I did notice lots of capped honey on the tops of the brood frames below, so they’re not doing absolutely nothing. The outer frames of their top deep brood box are still only half drawn as well, but coming along. I decided to start feeding them 50/50 sugar syrup again just so they can get a boost on beginning to draw out that comb.

DSC_0020.jpg

Finally drawing out the outer brood frames


DSC_0021.JPG

Just getting started on this medium frame

I’ve read that the pH of sugar water is around 6.0, while the pH of nectar is closer to 4.2. This imbalance can cause health problems for the bees so it’s best to keep feeding to an absolute minimum. I’ll probably feed this hive until they get their honey super comb well underway and then stop for good unless the bees are starving. Once I have some reserves of drawn comb to fall back on, I’ll be in a much better position.

DSC_0024.JPG

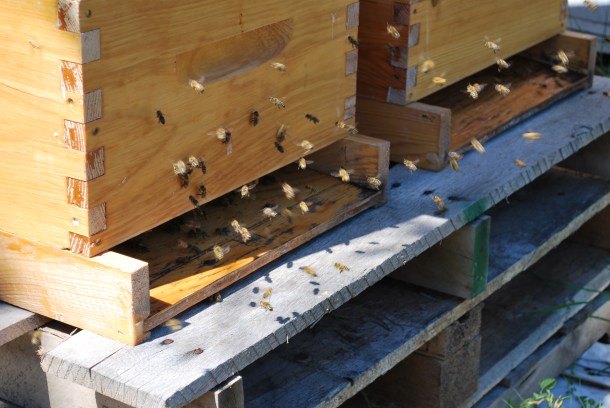
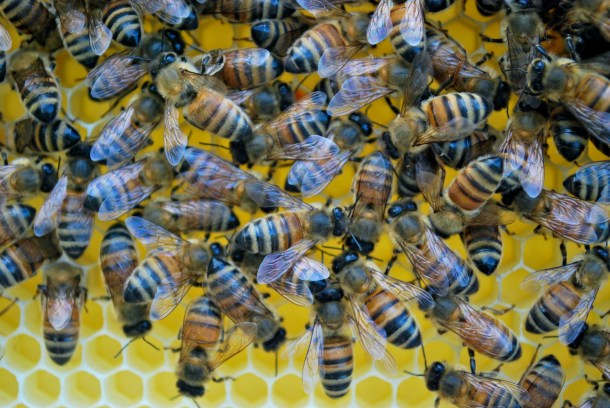
The two split hives on the other hand were doing great. Both honey supers that were added back in May are almost completely full of honey! I’m realizing now the wisdom of those who told me that switching to all medium boxes is the way of the future. Even a single medium frame full of honey is surprisingly heavy!

DSC_0047.JPG

Some uncapped nectar

DSC_0049.JPG

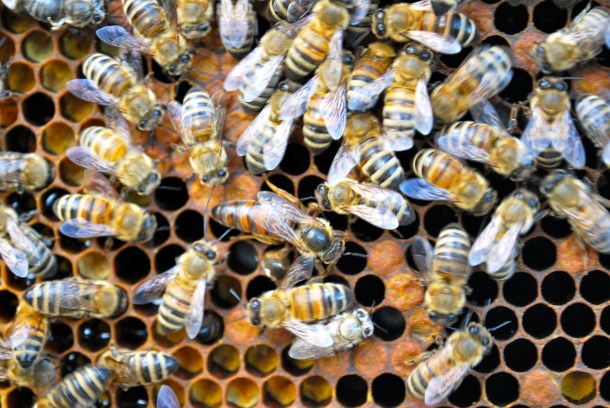
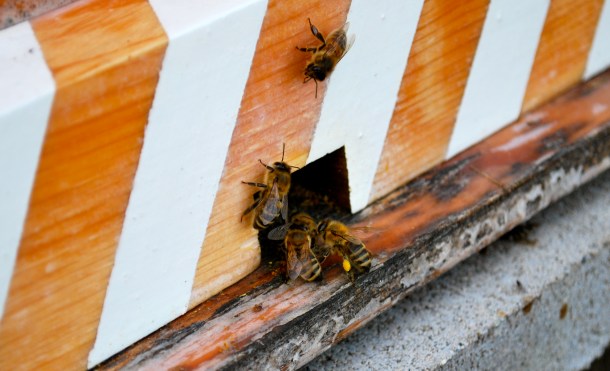
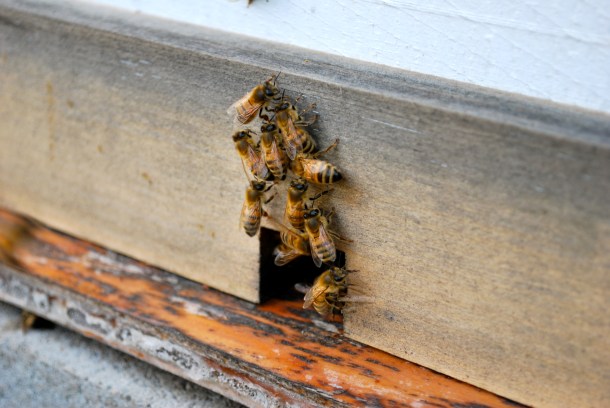
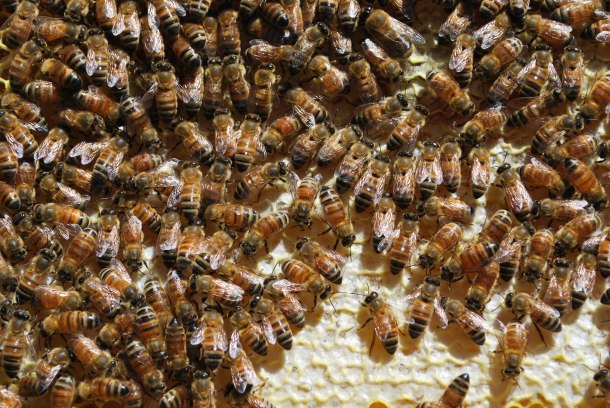
Look at all that capped honey!
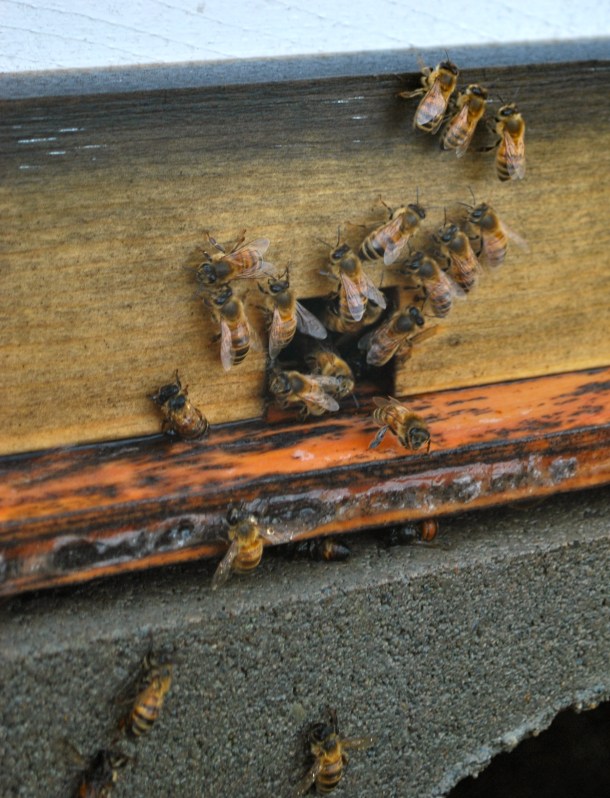
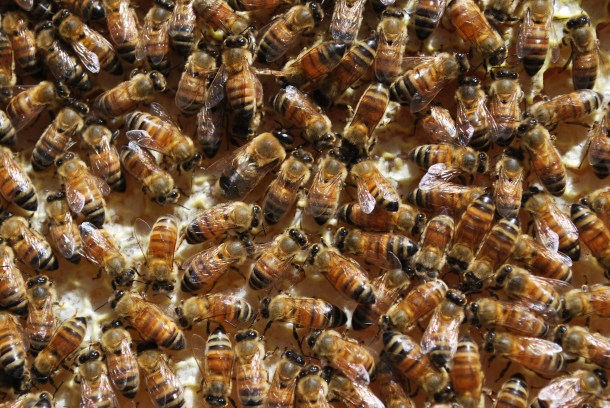
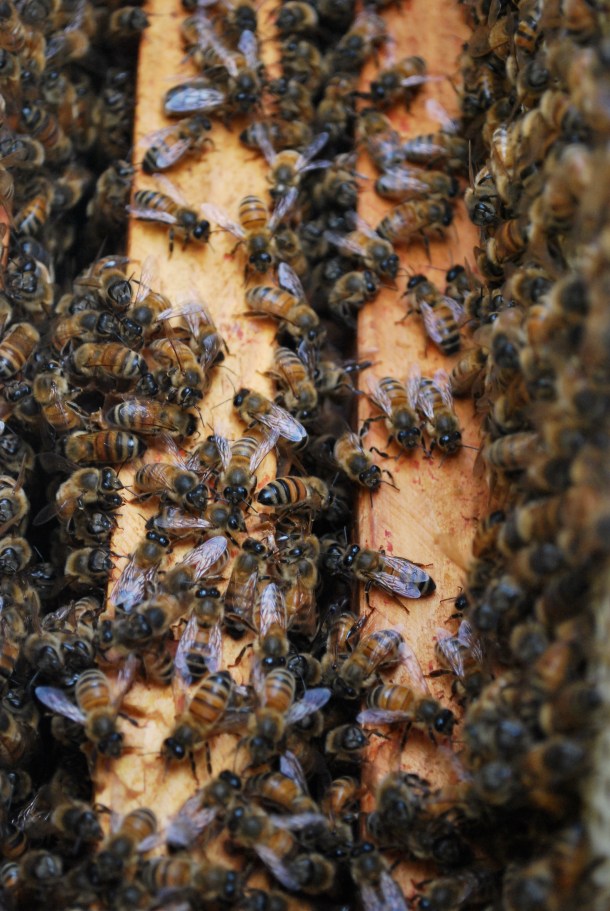
DSC_0059.JPG

Om nom nom

I might harvest a frame or two of honey this year, but for the most part I’m expecting to leave it for the bees since this is our first year.

I’ve been learning about the natural beekeeping method spoken about by Michael Bush, which is based on not treating bees and instead allowing weak bee genetics to die out and strong/hygienic genetics to take over. He makes a good point when he says that treating varroa mites only selects for stronger varroa and weaker bees. The theory is that if everyone stops treating for varroa, the bees will adapt within a few years and it will never be a serious problem again. Of course a lot of bees will die initially, but those are all bees with weak genetics anyway.

When the tracheal mite became the latest new threat to beekeeping back in the 80s, many beekeepers began treating for them. As soon as varroa came onto the scene, they stopped treating for tracheal so they could treat for varroa, and the losses from tracheal mites resolved itself quite well in just a few years. Now nobody really treats for tracheal mites.

The ecology of a beehive contains many microorganisms other than just bees, including a documented 170 types of mites. Damaging that ecology with pesticides and antimicrobial essential oils doesn’t make a lot of sense to me. I’ve made the decision to attempt to go treatment free with my hives and see what happens. I’ve already secured a few potential sites in friend’s yards so if I need to boost my hive numbers to ensure survival, that’s just what we’ll do.

DSC_0051.jpg