Dealing with a Bad Bee Seller (Paul Petersen of Red Queen Apiaries)

Well, here I am writing another post warning people about another unscrupulous business. And so soon! Of course, it must be because I’m nine months pregnant and have a hundred better things to do…

Most beekeepers I have met in person so far in my bee tending career have been absolutely lovely. I have had a few transactions over the years buying bees and equipment and everyone has been the epitome of helpful and honest. Then I decided this spring to buy a nuc from Mr. Paul Petersen of Red Queen Apiaries. Here is my horror story:

If you follow my blog you may know that I am trying my darndest to be a treatment free beekeeper. This doesn’t mean I throw my bees into a hive and ignore them until fall. I follow a very intensive integrated pest management program where I am constantly checking mite levels with sugar rolls, treating with sugar dustings and controlling mite levels with drone brood trapping, screened bottom boards, brood breaks and small cell comb. I keep very detailed records of mite counts, mite kills, colony health and progress. I just so far have not had to resort to any harder treatments such as oxalic acid, formic acid, thymol or agaricides.

Since I had been hearing more and more about the success that beekeepers in my area were achieving with hygienic and VSH queens, I really wanted to get some of these genetics into my apiary. For those who don’t know, hygienic bees are very good at detecting mites, diseases or issues within the brood cells and cleaning them out. VSH bees are very good at grooming varroa mites off of each other. They are different, but both types are better able to deal with varroa infestations than a standard hive. There is currently a program at the local university here (UBC) where hygienic queens are being bred with great success.

Lo and behold, I see a local online ad from Paul offering UBC hygienic queens for $45 and nucs for $220. I decide to inquire, and am told that the queens will be ready later in May, but the nucs will be ready in a few weeks. I ask if the nucs come with hygienic queens and he responds that they do not come with the hygienic queens from UBC (University of British Columbia), but that they ARE hygienic.

Screen Shot 2018-05-21 at 8.51.51 PM.png

All right, I thought. That sounds good enough for me. I also asked him if the nucs were 4 frame or 5 frame. He responded that they were 4 frames. Three frames of brood (and bees) and a frame of honey. So far so good, sounds pretty standard. So I sent him my $100 deposit.

Screen Shot 2018-05-21 at 8.49.33 PM.png

Then things started to get weird. I knew that hygienic bees didn’t necessarily mean treatment free bees, so I asked him what his treatment regimen was. No answer. Then the three week mark rolled around and I asked when my bees would be ready. I was told in another 2 to 3 weeks. What? Well, ok. The nectar flow was in full swing and I wanted to get my new bees going but I guess I had to wait.

I then get an email two weeks later asking me to call him. I did and he told me my bees would be ready for pickup the next day, I just had to drive 30 minutes to the pickup location in Nanoose Bay. He said he would email me the exact address the following day but that it was near a landmark gas station. All right, I said, see you at 6pm tomorrow.

The next day dawns and I’m excited to finally get my new bees home. I begin emailing Paul around noon to request the pickup address since I haven’t heard from him. I email over and over. Then I start calling and leaving messages. Finally 5:30pm rolls around and I have to leave if I want to arrive on time. We drive 30 minutes to the gas station and park. I continue to call and leave messages, by this time getting very annoyed.

He finally calls me back and says, “The pickup is tomorrow.” What? I tell him he told me the pickup was today. He says, “Oh sorry, I must have thought yesterday was today”. Seriously? Then he goes on to tell me he’s getting his bees inspected tomorrow so how could he possibly sell them today? Apparently my mind-reading skills didn’t pick up on that important fact. What was I thinking. We drive home.

After arriving home beeless, I email to ask him to please just drop the bees off at my house, which is no more than 5 minutes out of his way, since he is coming from Cobble Hill and since he has just wasted an hour of my time. He agrees, and tells me I need to get a deposit ready for the nuc box. I respond that I have a hive ready to put the bees in and can do it immediately, thus returning his nuc box right away. So far so good… Right?

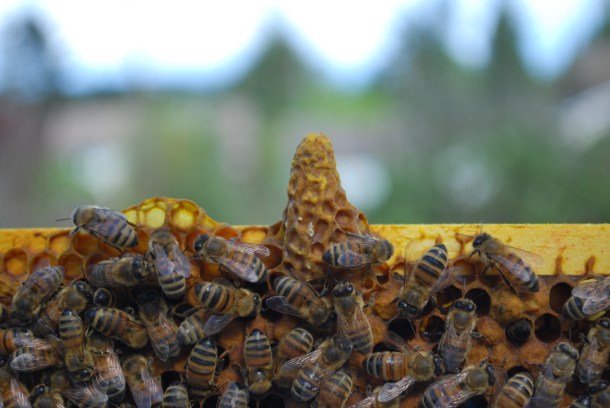
So, it’s 6pm the next day and Paul arrives with one of his helpers. I show him to the backyard where the hive is waiting and he begins unpacking the bees. He removes two frames of brood and bees and a frame of honey, then he takes out an empty drawn comb and says it’s a fresh comb for the queen to lay in. That’s odd. I thought we agreed upon three frames of brood. I have boxes and boxes of empty drawn frames, I don’t need to buy another one for $55. I should have said something about it at the time but for some reason I didn’t.

Then, sensing he was not an entirely honest businessman, I asked him again if the bees were hygienic and what their treatment schedule was. He responds that no, technically they’re not hygienic but you know, they’re good bees. They’re fine. Still no elaboration on treatments.

Now I was getting upset. I told him I specifically wanted hygienic bees because I was trying to be treatment free, and that’s what I thought I was buying. Well, apparently that was the stupidest thing I could have possibly said.

For the next solid half hour I was laughed at, ridiculed, interrogated, debased and basically told how ignorant and unscientific I was in about a dozen different ways by wanting to be treatment free. I was told that it was impossible, that it was a “fad” that young people were caught up in, that my research skills and experience were insufficient, that the experienced treatment free beekeepers that I followed were scam artists and assholes just trying to sell me bees, that hygienic bees basically didn’t exist, that I was in effect just infecting everyone else’s bees around me and that I was doomed to fail. To top it all off his lackey called me over and asked me if my dog got sick, would I refuse to take it to the vet? It was an absolutely horrible experience and I could not get the two of them to leave my yard fast enough. To Paul’s credit he did begrudgingly say that I could pick up a free hygienic queen later on in the season.

As soon as they left, I shot him an email saying that he had promised me both a hygienic queen and three frames of brood, and I wanted the replacement queen when they were available as well as a refund of $55, 25% of what I had paid for the nuc. No response.

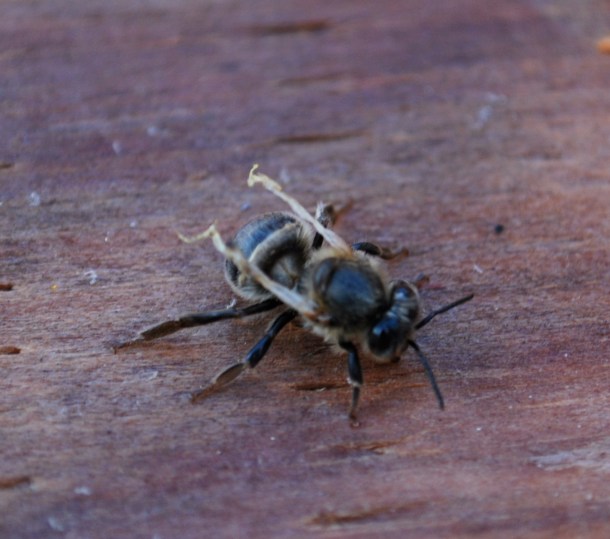
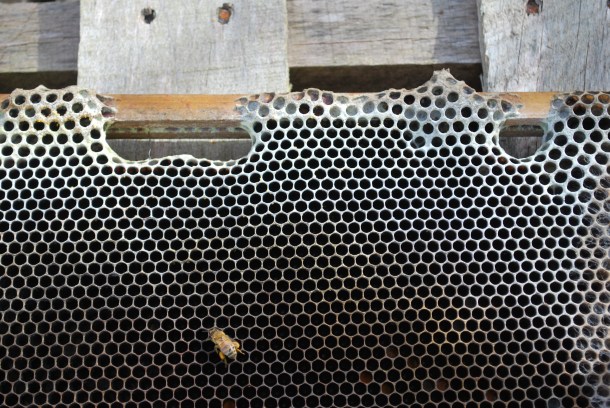
Three days go by and my phone starts ringing. It’s the bee inspector, saying a beekeeper has called her saying that my hives are diseased and she needs to check them. Well now, I wonder who that could be? She shows up later that day and I tell her the story of the nuc purchase. She checks my hives and says they are perfectly fine, then she checks the brand new nuc. I am told, “It’s not the worst nuc I’ve ever seen, but it’s close”.

DSC_0129

Doing business with Paul earned me a retaliatory visit from the bee inspector

Yeah. So there you have it. Mr. Paul Petersen of Red Queen Apiaries in Cobble Hill, BC. He is on the board of directors for the Cowichan Beekeeper’s Club and he even used to be the president. I definitely recommend staying far, far away from this dishonest, rude and vindictive man and his bees.


Swarm Cell!

DSC_0004.JPG

I’ve been checking my hives on a weekly basis to try to head off potential swarming. Looks like I was right on time!

This is the first swarm cell I’ve seen in any of my three hives, and I only found the one. I immediately removed the frame it was attached to and put it into its own nuc box along with a frame of pollen, a frame of honey, two empty frames and some extra nurse bees.

The nuc was set up in a new location with a pollen patty and sugar syrup feeder and I anxiously anticipate what develops. The hard part now is keeping my paws out of it for a week or two while they get themselves settled. Here’s hoping for a a well-mated queen and the beginnings of a healthy new hive.

DSC_0007.JPG

First Powdered Sugar Varroa Treatment a Great Success!

DSC_0035.JPG

I opened up my hives today and was chagrined to see that Hive 1 had some bees with wing and abdomen abnormalities due to varroa mite infestation. My other two hives also have mites but seem to be chugging along for now. I finally saw the queen of Hive 1 as well, which was excellent, but it was obvious that something needed to be done.

DSC_0025.JPG

Deformed bee

DSC_0022.JPG

Hive 1 queen

I’ve done scads of research online on the efficacy of the powdered sugar treatment. Some people say it works, some people say it’s a waste of time. The theory is that the sugar is just the right size to get under the mites’ feet and unstick them from the bees as they groom it off each other. It won’t do anything for the mites inside the cells, but you can treat multiple times to get them once they emerge. For instance, once a week for three weeks. I decided I had nothing to lose, so I installed my new DIY screened bottom board and got out a cup of icing sugar.

DSC_0038.JPG

At least this treatment is easy to apply! I dumped the cup of sugar on the top brood box and brushed it in between all the frames. I soon had a bunch of very white, very pissed off bees.

DSC_0045.JPG

Then I closed it up and waited. But not for long… Less than an hour later I had to check and see the results, if any. I pulled out the tray and my jaw absolutely dropped.

DSC_0002.JPG

It was totally loaded with mites! I counted probably around 600 mites and after I waited another couple of hours there were easily 1000 mites on the tray, struggling in the sugar. That is a LOT of phoretic varroa.

I am SO glad that I decided to do this treatment. I immediately got to work making two more screened bottom boards for my other hives and they will be getting treated as soon as possible. I plan to give them all a weekly treatment for at least three weeks or until the mite drop is significantly lowered. I’m so glad that I didn’t have to resort to any harsh chemicals and I’m incredibly impressed with how this simple trick has worked.

Wild Edibles: Dame’s Rocket

DSC_0023.JPG

These flashy little plants showed up in my bee yard completely out of nowhere. I’m sure nobody planted them but I have seen them growing in my neighbor’s yard a couple of houses down. A quick search shows it to be an invasive plant, but it’s also edible and has medicinal qualities.

DSC_0022.JPGDSC_0021.JPG

The bitter, pungent leaves, which are high in vitamin C are great in salads as the plant is closely related to arugula. The flowers are aromatic, but only in the evenings. It is purported to induce sweating, promote urination and loosen a cough. When in flower, it is said to be a gland stimulant and aphrodisiac.  It’s also a great nectar source!

DIY Convertible Screened/Solid Bottom Board

DSC_0004.JPG

I mentioned in the previous post how I didn’t really like the screened bottom board options available to me locally, not to mention the fact that they were all very expensive. All the designs I saw online seemed overly complicated or had what I perceived as flaws.

I have a lot of raw cedar boards left over from fencing my yard, and I figured this was a great way to use some of them up. Not to mention this is a very simple design that doesn’t require any rabbets.

DSC_0002.JPG

Solid bottom board base

I had seen a bottom board similar to this on the University of Guelph’s beekeeping videos on Youtube, but couldn’t find instructions to build them anywhere. It’s a two-part design that can be used either as a solid bottom board, or as a screened bottom board with mite collection tray. My design is a little bit different from theirs as I’ve incorporated a small landing strip. It’s not necessary for the bees but I like the look of it.

The unit consists of a simple solid bottom board made from two 1 by 2 by 21 1/4″ rails and a 1 by 2 by 14 5/8″ back rail. (These are all exact dimensions, I’m not using dimensional lumber for this.) I used 3/4″ thick boards for the base but you could also use plywood. It’s assembled with screws, nails and glue. The two inch entrance is a bit large, but it can be made smaller with an entrance reducer. The reason I kept it at two inches, is that I’ve read you get a better mite kill if they fall at least two inches down.

DSC_0007.JPG

Screened top piece

The second piece is a separate screened insert made from two 1 by 1 by 21 1/4″ rails and two 1 by 1 by 16 5/8″ rails, with a piece of 15 3/4″ by 21 3/8″ hardware cloth stapled to it (also known as #8 or 1/8″ galvanized or stainless steel mesh). I stapled the mesh to the long sides and back first, then screwed on the “landing porch” rail and stapled the mesh down well along the lip. If you go over the mesh edge and staples well with a hammer it presses it down into the wood giving you a relatively smooth entry point.

DSC_0006.JPG

Back view with screen installed and quality control crew

The genius of this design is that to use it as a screened bottom board, you simply turn the solid board around and place the screen on top. The old solid board entrance now becomes the back where you can insert your mite board or oil pan. Since the wood edges are all flush, there’s no lip under the mesh for the mites to land on and crawl back up, an issue I’ve noticed with a lot of other designs.

I will most likely use recycled plastic core-flute (coroplast) for my mite boards, and screw another piece of cedar to the edge of them to cover most of the back opening and serve as a removal handle. The large two inch space would allow you to fit a large metal roasting pan underneath filled with oil if desired. You don’t want to leave the two inch gap at the back wide open as bees have been known to build mini-hives under the screen in that space! You’ll also want to make sure the unit sits on some kind of stand so the flat bottom board is not in direct contact with the ground where it can wick up moisture.

I really like the versatility and simplicity of this design, and I love that I’m only really paying for the cost of the mesh and hardware. I finish the bases off with a few coats of tung oil and they’re ready to install!

DSC_0001.JPG

With screened board installed

DSC_0003.JPG

DSC_0004.JPG

With screen removed

Spring Bee Hive Cleaning

DSC_0044.JPG

We finally had a nice enough day for me to open up all my hives, go through each frame and tidy everything up. It took a good hour per hive, but was very informative!

All three hives had capped and open brood that was concentrated in the top box. For this reason, I inverted all my brood boxes so that the top box was on the bottom and the bees could start to work upward as they seem to prefer to do.

DSC_0025.JPG

A dirty bottom board after a long winter

DSC_0012.JPG

Cleaning up

DSC_0023.JPG

Moldy comb. A strong hive will clean this right up and use it with no problems

All the bottom boards were extremely dirty and needed a good scraping or replacing. It felt really good to get all that detritus out of there as it’s just a breeding ground for pests and mold. My hives were a little damp inside, even to the point where I saw some slugs hiding out and some mold on a few unused frames. I think I really have to get going making and installing quilt boxes and screened bottom boards to improve the airflow situation.

DSC_0006.JPG

You can see two shiny brown varroa mites clinging to the back of the bee near the middle

Sadly, I did notice varroa mites in all three hives after a whole year of not seeing a single one. Hive 1 had some visible phoretic mites while the other two had mites revealed in some of the capped brood that was broken when I removed frames and cross-comb. I’m thinking of trying a powdered sugar treatment regimen but am still in the research stages of figuring out efficacy. I’ll also need to install screened bottom boards first. I don’t like the ones available for sale locally so I’m working on my own design, which I’ll share in an upcoming post.

DSC_0014.JPG

Hive 2’s queen

A lovely surprise was coming across two of my queens totally by accident! I wasn’t even looking for queens, just checking for eggs. I guess all the research I’ve been doing over the winter has made me better able to spot them because they really jumped out at me, visibly. Hive 2’s queen was looking a little small to me compared to the big feral mated queen from Hive 3. Not sure if that will become an issue or not. I know the smaller queen is older and this hive has the smallest population, so we’ll see if it’s prudent to requeen this year or not.

DSC_0035.JPG

Hive 3’s feral mated queen

DSC_0034.JPGDSC_0032.JPG

One hive had a little bit of drone brood started, and I added an empty frame to each hive so they can build more. This will allow me to do drone trapping which will help with mite control. It also means that it’s almost swarm season and split season. Yay!

DSC_0040.JPG

A little bit of bullet-shaped drone brood at the top of the frame

The biggest job was scraping off all the burr comb and built up propolis so the frames would sit neatly once again. I was actually hoping to get stung during this work as I’ve been told that getting stung more will help build up antibodies and make me less susceptible to developing a bee venom allergy. Even my most defensive hive refused to oblige me though so I may have to start taking matters into my own hands, literally. At least stinging yourself gives you the option of where you get stung!

DSC_0037.JPG

Some broken drone brood

During the frame cleaning some capped brood was inevitably broken open. Never a happy thing but it gave me a chance for something I’ve been wanting to try, which is tasting bee larvae. They have a nutty, slightly sour taste. Not particularly unpleasant. I’ve read that the reason bears try to break open hives is primarily to get at the protein-rich brood while the honey simply serves as a nice dessert.

DSC_0010.JPG

Happy bees!

DSC_0047.JPG

Bring on the 2017 beekeeping season! 🙂


DIY Swarm Trap/Nuc Box

DSC_0004.JPG

When I moved here, the garage contained a waterlogged, rotten old plywood workbench that I ripped out right away. It was super gross, but there were still a few pieces of wood that looked salvageable. I let it dry out really well and was able to turn what was left into two lovely little nuc boxes!

Since I don’t have any nucleus colonies to house in them right now, I’ve set them up as swarm traps. They each contain five medium frames that have been worked on by my bees last year (so they smell good to scout bees), and a lure, which is just a drop or two of lemongrass oil on a q-tip, in a small plastic bag.

They’re a bit small to be ideal swarm traps at 20 litres, as bees prefer a volume of about 40 litres (the size of a deep brood box), but it can’t hurt to try! Ideally, you want them in a sunny location at least ten feet up off the ground. I check mine every day and I love that I can make something useful out of something that seemed destined for the burn pile! I’ll post the exact measurements and instructions on how to build this nuc box at a later date, stay tuned!

Watering Your Bees

DSC_0067.jpg

Bees need water! It’s not so much of an issue now in the spring, but in the heat of summer you don’t want them visiting your neighbors’ swimming pools and bird baths. Not everyone is fond of them!

It’s instinctual for us to want to provide clean, fresh water for our pets and livestock, but bees don’t like it that way. For whatever reason, they seem to prefer stagnant water full of debris that has been sitting around for as long as possible. Perhaps that makes it easier to smell?

We do know why they appreciate debris, it’s so they can get a drink without drowning. A perfect solution to your thirsty bee problem is a bowl full of pebbles, moss and leaves, woodchips, or a combination of the above. It’s a good idea to get it in place now so the bees can learn where it is by the time they really need it. If you leave it in a place where rainwater can replenish it, all the better.

We Have Mason Bees!

DSC_0005.jpg

This year we are adding mason bees to the homestead. A good friend has gifted me with four tubes of bees and their house is ready and waiting. Once daytime temperatures are stable at around 13 degrees Celcius (55 degrees F), I will place them outside to hatch. For now, they are hibernating in the fridge.

They will require nectar sources nearby as well as a mud source to lay the next generation of bees once they emerge. We definitely have the mud, but not a lot of flowers yet, so until conditions are perfect, we wait.


First Pollen of the Season

DSC_0064.JPG

The snow is finally all gone and each of my three hives are busy with housekeeping. When I looked in on them today I saw many dead bees being dragged out and amazingly, I saw bees loaded with pale yellow pollen coming in!

DSC_0087.JPG

I haven’t seen any flowers blooming anywhere yet except for the snowdrops, so perhaps they are harvesting those. I haven’t noticed a single bee visiting the snowdrops on my property though, even though we have a fair amount. At any rate, it was a very cheerful sight!

DSC_0073.JPG

There was lots of activity in all three hives and lots of fuzzy new bees. You can tell young bees by how fuzzy they are as the older they get the more bald they look. One new little bee took a break on my hand to warm up and groom herself a bit before returning to work. Did you know the first job a bee has is cleaning out the cell she has just emerged from?

DSC_0080.JPG