I mentioned in the previous post how I didn’t really like the screened bottom board options available to me locally, not to mention the fact that they were all very expensive. All the designs I saw online seemed overly complicated or had what I perceived as flaws.
I have a lot of raw cedar boards left over from fencing my yard, and I figured this was a great way to use some of them up. Not to mention this is a very simple design that doesn’t require any rabbets.
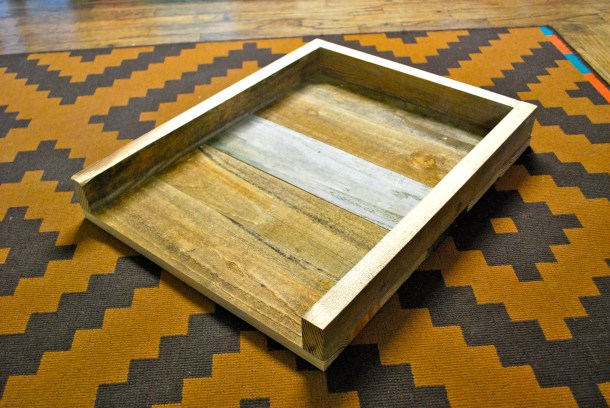
Solid bottom board base
I had seen a bottom board similar to this on the University of Guelph’s beekeeping videos on Youtube, but couldn’t find instructions to build them anywhere. It’s a two-part design that can be used either as a solid bottom board, or as a screened bottom board with mite collection tray. My design is a little bit different from theirs as I’ve incorporated a small landing strip. It’s not necessary for the bees but I like the look of it.
The unit consists of a simple solid bottom board made from two 1 by 2 by 21 1/4″ rails and a 1 by 2 by 14 5/8″ back rail. (These are all exact dimensions, I’m not using dimensional lumber for this.) I used 3/4″ thick boards for the base but you could also use plywood. It’s assembled with screws, nails and glue. The two inch entrance is a bit large, but it can be made smaller with an entrance reducer. The reason I kept it at two inches, is that I’ve read you get a better mite kill if they fall at least two inches down.

Screened top piece
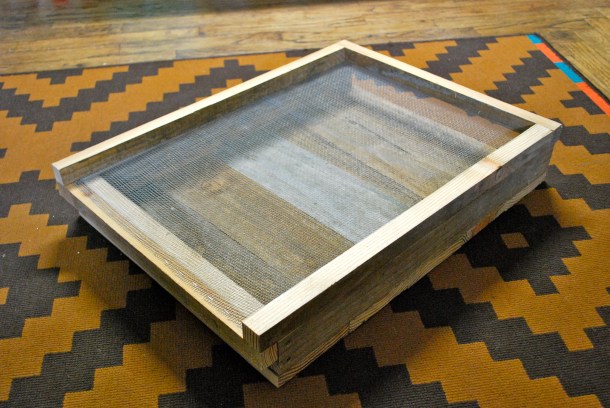
The second piece is a separate screened insert made from two 1 by 1 by 21 1/4″ rails and two 1 by 1 by 16 5/8″ rails, with a piece of 15 3/4″ by 21 3/8″ hardware cloth stapled to it (also known as #8 or 1/8″ galvanized or stainless steel mesh). I stapled the mesh to the long sides and back first, then screwed on the “landing porch” rail and stapled the mesh down well along the lip. If you go over the mesh edge and staples well with a hammer it presses it down into the wood giving you a relatively smooth entry point.

Back view with screen installed and quality control crew
The genius of this design is that to use it as a screened bottom board, you simply turn the solid board around and place the screen on top. The old solid board entrance now becomes the back where you can insert your mite board or oil pan. Since the wood edges are all flush, there’s no lip under the mesh for the mites to land on and crawl back up, an issue I’ve noticed with a lot of other designs.
I will most likely use recycled plastic core-flute (coroplast) for my mite boards, and screw another piece of cedar to the edge of them to cover most of the back opening and serve as a removal handle. The large two inch space would allow you to fit a large metal roasting pan underneath filled with oil if desired. You don’t want to leave the two inch gap at the back wide open as bees have been known to build mini-hives under the screen in that space! You’ll also want to make sure the unit sits on some kind of stand so the flat bottom board is not in direct contact with the ground where it can wick up moisture.
I really like the versatility and simplicity of this design, and I love that I’m only really paying for the cost of the mesh and hardware. I finish the bases off with a few coats of tung oil and they’re ready to install!

With screened board installed


With screen removed

Pingback: First Powdered Sugar Varroa Treatment a Great Success! | Abernathy's Rabbitry
Pingback: BL: 3 Beekeeping Myths | The Barefoot Aya
simplistic, inexpensive, I like it very much ! Thank You