Two Ingredient Natural Bug Spray that Really Works

DSC_0006.JPG

Biting bugs are the worst. But I would argue that the majority of commercially available bug sprays and lotions are even more horrible.

I work outdoors a lot and mosquito season is just beginning. I always seem to forget how infuriating it is to try and get things done outdoors when you’re constantly swatting at these whining pests. Not to mention they can carry dangerous diseases.

However, the thought of smearing myself with pesticide cream or who knows what else gives me the creeps. I had to figure out a better solution, luckily the answer is easy, effective, cheap and natural.

Two ingredients: witch hazel and lemon eucalyptus essential oil.

I usually put a few tablespoons of witch hazel into a small glass jar and then add about 12 – 24 drops of essential oil. You can also pour it into a small spray bottle. Shake well before each use and then just rub into any exposed areas, including your face. It has a light, lemony smell and leaves no residue. In fact in the off season I will sometimes use this concoction as a refreshing toner! Mosquitoes will give you a wide berth when sporting this stuff.

Cheaper than commercial sprays, lasts forever and the witch hazel helps extend the oil and also thin it out to help avoid skin irritation for those that are sensitive. Win-win!

Free Rabbit Food (and People Food): Oxeye Daisy

DSC_0001.JPG

Leucanthemum vulgare is an iconic perennial flowering herb that is native to Europe but can be found all over the world. It’s also called the dog daisy, common daisy or moon daisy and can be seen in fields, woodlands and along roadsides. It has serrated to dentated dark green leaves and spreads via rhizomes.

I have a large patch of this in my rabbit forage field and the bunnies always go for these juicy stalks first when they get their daily bundle of wild grasses. The dead nettle has died down for the most part and so the oxeye daisy makes for much of their non-grassy forage this time of year, now that it is getting hotter.

DSC_0005.jpg

The young leaves of this herb can also be used in salads, and the dried leaves have a bitter and tingling flavor similar to that of valerian. The immature flower buds can be marinated and used like capers, which is what I’m preparing today. They have a unique, delicate sweet and spicy flavor that complements many dishes such as smoked fish, salads, pates and sauces.

DSC_0006.JPG

You must select tightly closed flower buds to ensure the best flavor and that no bugs have made their way in. Then take 1/2 cup apple cider or wine vinegar and 1/2 cup water mixed with 1 tablespoon sea salt and use to cover your flower buds in a glass jar or ceramic crock. Refrigerate and they will be ready to use after three days but will keep in the fridge much longer than that.

DSC_0001.JPG
DSC_0001.JPG

DIY Convertible Screened/Solid Bottom Board

DSC_0004.JPG

I mentioned in the previous post how I didn’t really like the screened bottom board options available to me locally, not to mention the fact that they were all very expensive. All the designs I saw online seemed overly complicated or had what I perceived as flaws.

I have a lot of raw cedar boards left over from fencing my yard, and I figured this was a great way to use some of them up. Not to mention this is a very simple design that doesn’t require any rabbets.

DSC_0002.JPG

Solid bottom board base

I had seen a bottom board similar to this on the University of Guelph’s beekeeping videos on Youtube, but couldn’t find instructions to build them anywhere. It’s a two-part design that can be used either as a solid bottom board, or as a screened bottom board with mite collection tray. My design is a little bit different from theirs as I’ve incorporated a small landing strip. It’s not necessary for the bees but I like the look of it.

The unit consists of a simple solid bottom board made from two 1 by 2 by 21 1/4″ rails and a 1 by 2 by 14 5/8″ back rail. (These are all exact dimensions, I’m not using dimensional lumber for this.) I used 3/4″ thick boards for the base but you could also use plywood. It’s assembled with screws, nails and glue. The two inch entrance is a bit large, but it can be made smaller with an entrance reducer. The reason I kept it at two inches, is that I’ve read you get a better mite kill if they fall at least two inches down.

DSC_0007.JPG

Screened top piece

The second piece is a separate screened insert made from two 1 by 1 by 21 1/4″ rails and two 1 by 1 by 16 5/8″ rails, with a piece of 15 3/4″ by 21 3/8″ hardware cloth stapled to it (also known as #8 or 1/8″ galvanized or stainless steel mesh). I stapled the mesh to the long sides and back first, then screwed on the “landing porch” rail and stapled the mesh down well along the lip. If you go over the mesh edge and staples well with a hammer it presses it down into the wood giving you a relatively smooth entry point.

DSC_0006.JPG

Back view with screen installed and quality control crew

The genius of this design is that to use it as a screened bottom board, you simply turn the solid board around and place the screen on top. The old solid board entrance now becomes the back where you can insert your mite board or oil pan. Since the wood edges are all flush, there’s no lip under the mesh for the mites to land on and crawl back up, an issue I’ve noticed with a lot of other designs.

I will most likely use recycled plastic core-flute (coroplast) for my mite boards, and screw another piece of cedar to the edge of them to cover most of the back opening and serve as a removal handle. The large two inch space would allow you to fit a large metal roasting pan underneath filled with oil if desired. You don’t want to leave the two inch gap at the back wide open as bees have been known to build mini-hives under the screen in that space! You’ll also want to make sure the unit sits on some kind of stand so the flat bottom board is not in direct contact with the ground where it can wick up moisture.

I really like the versatility and simplicity of this design, and I love that I’m only really paying for the cost of the mesh and hardware. I finish the bases off with a few coats of tung oil and they’re ready to install!

DSC_0001.JPG

With screened board installed

DSC_0003.JPG

DSC_0004.JPG

With screen removed

DIY Swarm Trap/Nuc Box

DSC_0004.JPG

When I moved here, the garage contained a waterlogged, rotten old plywood workbench that I ripped out right away. It was super gross, but there were still a few pieces of wood that looked salvageable. I let it dry out really well and was able to turn what was left into two lovely little nuc boxes!

Since I don’t have any nucleus colonies to house in them right now, I’ve set them up as swarm traps. They each contain five medium frames that have been worked on by my bees last year (so they smell good to scout bees), and a lure, which is just a drop or two of lemongrass oil on a q-tip, in a small plastic bag.

They’re a bit small to be ideal swarm traps at 20 litres, as bees prefer a volume of about 40 litres (the size of a deep brood box), but it can’t hurt to try! Ideally, you want them in a sunny location at least ten feet up off the ground. I check mine every day and I love that I can make something useful out of something that seemed destined for the burn pile! I’ll post the exact measurements and instructions on how to build this nuc box at a later date, stay tuned!

Eggshells Instead of Bone Meal for the Garden

DSC_0009.JPG

Plants need calcium, especially things like tomatoes which will suffer from blossom end-rot without sufficient amounts.

I save all my eggshells and my birds generate about 5 to 10 pounds worth per year. I dry them, crush them and every spring I spread them all over my gardens. Today was eggshell-spreading day! There are usually none left over, but when there are they get fed back to the birds who love them.

DSC_0006.jpg

I really appreciate that I don’t have to purchase bone meal, which is a by-product of the beef industry. It’s nice using fertilizers that are generated right here on the property and it saves me money. I don’t bother crushing them to a powder, I just do the best I can and they decompose over time.

It’s a myth that eggshells will prevent slugs in your garden. Tests have shown that they actually attract them! If slugs are a concern for you, turn your eggshell into the soil so they’re covered. I don’t bother with this because my ducks eat most of the slugs around here and I like the way the shells brighten things up.

DSC_0073.JPG


Naturally Treating Coccidiosis in Rabbits

DSC_0005.jpg

I’ve had this very contagious disease pop up a couple of times in my meat herd, usually as a result of pasturing my young rabbits. You can very easily tell if you have sick bunnies: they lose their appetites, their backbones become visible and noticeably palpable, they act listless and they develop chronic diarrhea. Don’t lose hope though, you can almost always bring sick rabbits back to perfect health without resorting to pharmaceuticals if you catch it early enough.

I was given a bottle of some foul brown liquid from a breeder when I acquired my first rabbit pair, and was instructed to add it to the water for five days on, five days off and five days on again as a coccidia preventative. I dutifully did so at first, and my bunnies hated it. I didn’t know any better. The bottle still sits half full on the shelf almost four years later and I will likely never use it again. Instead I’ve developed a natural method for treating this often deadly disease. Of course now my main focus is prevention and it hasn’t been an issue since then.

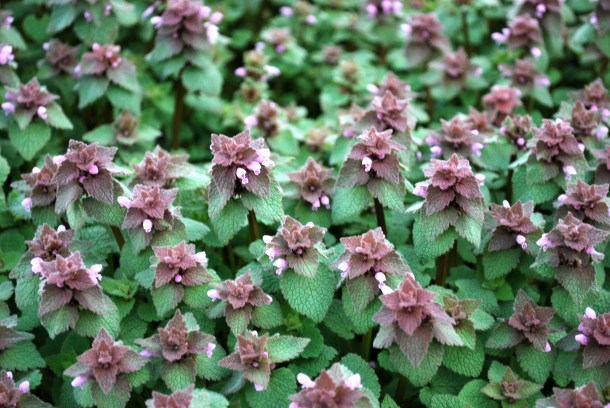
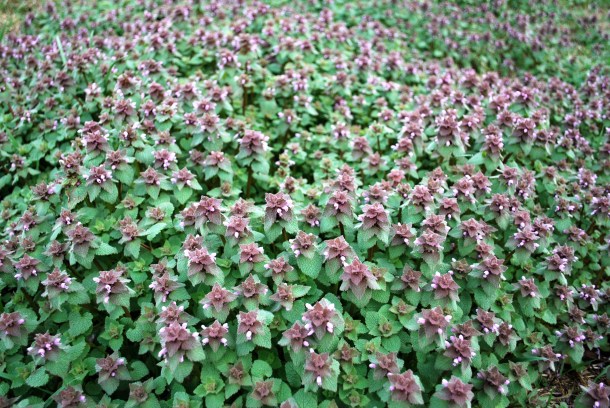
Coccidia is a parasite that is found pretty much everywhere in the soil. Young rabbits are more susceptible to it than adults. If you have rabbits on pasture or feed fresh greens there is always the possibility of infestation. It’s passed on through rabbit feces via cysts. If one young bunny in a colony has it, they probably all do. The best prevention is to keep rabbit environments clean, raise rabbits on wire-bottomed cages, move pastured rabbits to fresh ground frequently, dry or thoroughly wash fresh greens and keep bunnies away from soil that has recently been occupied by other types of livestock or pets, especially chickens and dogs.

All right, so the worst has happened, your bunnies are sick. If they have the symptoms listed above and have been exposed to pasture/greens, they probably have coccidiosis. Here are the immediate steps to take:

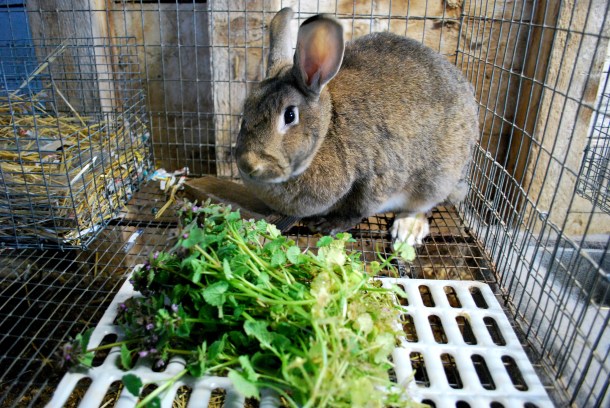
Clean. You must disinfect the environment or get your rabbits to fresh pasture immediately. I recommend getting them off the ground completely if they become sick and putting them into a wire-bottomed cage where feces can drop away and not recontaminate them. You can either use bleach or white vinegar to thoroughly clean all cages, water vessels and toys. Be sure to rinse well in fresh water after disinfection. Wire-bottomed cages with appropriately-sized spacing (1/2″ by 1″) are not cruel. Rabbits have well-furred feet that are adapted to rough surfaces and their nails hang down naturally through the wire adding to their comfort.

Water. If you don’t already do this, begin adding apple cider vinegar to the water. One tablespoon per 32 oz. water bottle is sufficient, but you may add as much as you want as long as your rabbits will still drink. This acidifies the gut, adds trace minerals and is excellent for overall gastrointestinal health. I use small amounts of ACV in my rabbit water all year round. It helps prevent algae growth, promotes good health and if you take your rabbits to a show in a different town, the drinking water there will still taste familiar to them. I’ve also noticed increased vigor in all my bunnies once I made this permanent addition.

DSC_0073.JPG

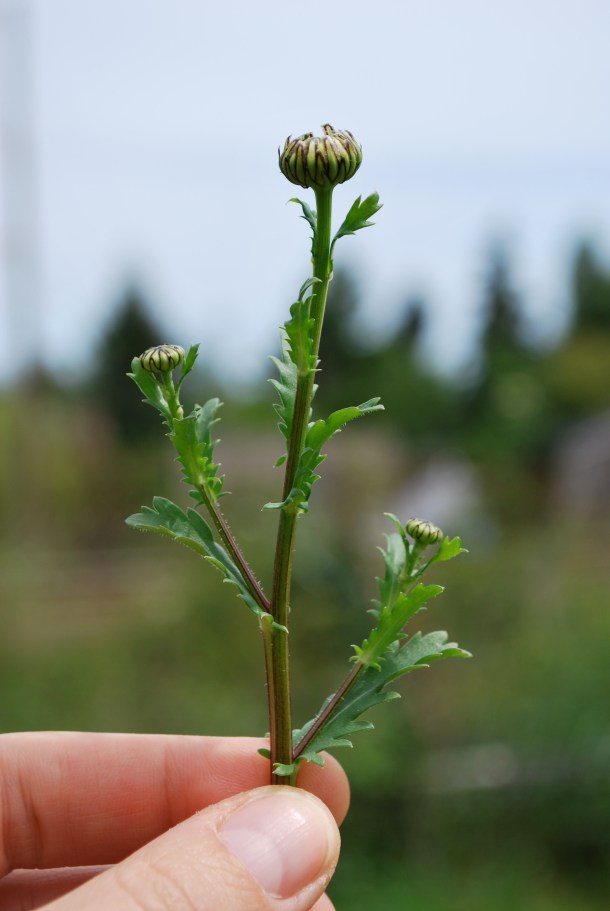
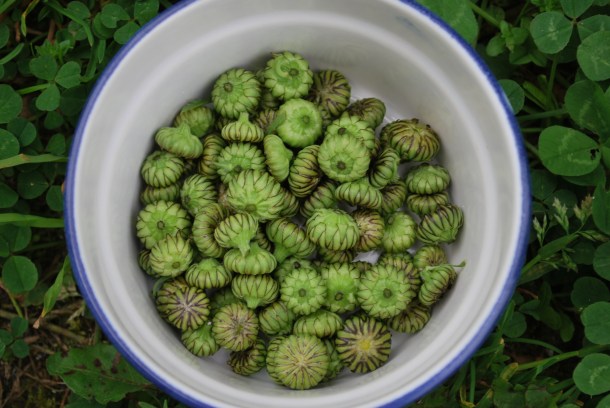
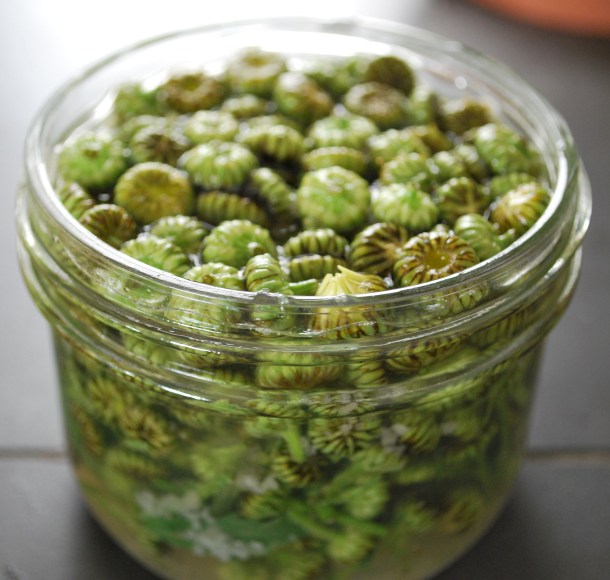
Blackberry. This is the most vital element to combating the parasite. Blackberry leaves and vines are one of the most important medicinal plants for rabbits and luckily they grow as invasive weeds in most places in the world. You’ll likely never have to drive far to find some, even in the dead of winter. Provide your rabbit with as much fresh or dried leaves and vines as they can eat. Don’t worry about the thorns, your rabbit will likely eat them first. Avoid giving the blackberry drupes (fruit) themselves if possible, although a few here or there will not hurt. Blackberry is a powerful anti-diarrhea herb for rabbits and in many cases, prolonged loose stools are the real reason your rabbit will lose the battle with coccidia. Also be sure to provide plentiful dry grass hay and clean pelleted food. Stop feeding any other vegetable or fruit treats. Promptly remove any food that becomes soiled or contaminated with feces.

With this regimen initiated at the very first signs of sickness, I have rarely lost a bun to the disease. Your rabbit may sustain some level of liver or intestinal damage from the parasite, but in most cases they go on to live perfectly normal and healthy lives. If you butcher meat rabbits that have been infected, you may notice yellow or white spots on the liver as a result. Affected livers like these should not be consumed by humans. To see photos of an infected liver, you can check out my previous post on hepatic coccidiosis here.

Keep those bunnies healthy! 🙂

We Like Packages

DSC_0011.JPG

I always leave boxes and packaging out for shipments I’ve received so the cats can fully exhaust their “usefulness”. They loved this fancy shredded paper from Scotland! It will be destined for the compost pile after hanging out under some rabbit cages for a bit.

Of course it means waking up to this scene every day for a week. Totally worth it.

Free Rabbit Food: Purple Dead Nettle

DSC_0023.JPG

This is the first post in a series where I show you the seasonal wild, free foods that I feed to my rabbit herd. It’s good for them and cheap for me, so it makes us all happy!

DSC_0024.JPG

Purple dead nettle, also known as purple archangel or Lamium purpureum, is a herbaceous flowering member of the mint family common to North America, Europe and Asia. It’s edible to humans both cooked and raw and contains vitamins C, iron and fiber as well as flavonoids and minerals. It’s known in the herbal world as an astringent, diuretic, diaphoretic and purgative.  It’s also anti-inflammatory, anti-bacterial, and anti-fungal.  The leaves can be used on external wounds or cuts, or as a poultice.

DSC_0022.JPG

I have a whole field of this stuff popping up this spring, and the bunnies are loving it. I’ve been giving them all a great big handful each day and it disappears fast. Maybe your bunny would enjoy it too?

DSC_0018.JPG

Caraway is about to mow down this pile to nothing

Deep Litter Method for Rabbits

DSC_0017.JPG

Mathurine in her deceptively empty cage. She has just demolished a pound of wild greens and the remnants have been folded into the bedding

Lately I’ve been trying something new in my rabbitry, the deep litter method.

Many people use this method with chickens, pigs or cattle; but it isn’t something you would normally think to use with rabbits, unless they’re conveniently on wire like mine.

My cages used to be about a foot off the ground, and this meant I needed to do a thorough cleaning every week. More often if there were growing litters. Most of my bunnies are currently housed over a concrete floor, and I use pine pellet bedding underneath to absorb the urine. This works great because wood pellets require a good nitrogen source to start breaking down properly, and the urine provides that. It creates amazing compost in a very short time.

Not long ago however, I raised my cages up another foot. Not only did this make it easier to clean underneath them, but I noticed that if I just stirred up the litter daily with my garden hoe and kept adding more pellets to wetter areas as needed, that the bedding was beginning to compost under the cages. There was a lovely earthy smell in the barn and pellet use was cut down to about one tenth of what I was using before. The 6″ to 12″ thick layer is also much better at absorbing urine and water spills.

Another added benefit is it’s pretty much ready to go right into the garden once you do finally clean it out. I plan to leave a 2″ layer of old material underneath once I do this, in order to reinoculate the new bedding. I’ve read that commercial chicken farmers actually have a lower mortality rate for new chicks if they are introduced to well-aged deep litter bedding as opposed to a freshly sanitized clean environment, because the good bugs establish slowly and fight off the bad bugs, which establish more quickly. It makes sense to me.

Everything that falls into the bedding gets mixed in and helps the breakdown process along. Hay, straw, bits of vegetation that the rabbits drop, feed pellets, shredded paper and fur. Since I get a lot of free used coffee grounds from the local Starbucks, I sometimes sprinkle a few cups over the top.

In some areas, when I fluff up the bedding I find colonies of maggots. These spots have the blackest and richest looking compost in them, and I will sometimes scoop a bunch of it out and toss it into the chicken coop for the girls to pick through. The maggots are a great and free high protein treat for them.

Seed Starting

DSC_0001

I think I can say that this is the first time in my life I’ve started my seeds on time, and properly. I now have a seedling heat mat, and was happy to find small greenhouse flats at the dollar store for a buck each. I made free plant markers out of plastic yogurt lids, and the seaweed snack trays I’ve been saving fit perfectly six to a flat. Let’s go!


First to sprout was the curly endive and broccoli in less that 24 hours, followed by the marigolds, okra and thyme at about 48 hours. I have my tomato and pepper seeds going, as well as some herbs that I’d like more of. I go through thyme so quickly and it grows so slowly!

The tomatoes I have started are Aunt Ruby’s German Green, Prudens Purple, Black Sea Man and Green Grape. A couple of the seed varieties are older so I may have to start more. The Prudens Purple are from 2008!

For peppers right now I have Jalapeno, Poblano, Sweet Banana (thought it was hot),  and New Mexico 6 Chili. Planning to also do Habaneros.

DSC_0003


I went seed shopping today and got a bunch of fun stuff. Seedy Sunday is next weekend but I just couldn’t help myself.

Starting from top left we have mixed Iceland poppies, mixed violas, variegated nasturtium, tarragon, edamame, rhubarb, borage (I know it’s a weed!), rainbow carrots, daikon radish, collard greens, castor bean, shallots, scallopini squash (pattypans), golden beets, crystal apple cucumber, lemon cucumber, brussels sprouts, celery and bergamot. Phew! Did you know that some people hide seeds behind other seeds at the seed store? They do!


I also picked up a flat of Winterbor kale since there were no seeds available and it’s a variety I wanted to try. It’s the curly green kind most often found at the store.

Last I grabbed some elephant garlic and a canna since I’ve never grown one and I find them lovely. It will need to be lifted in the fall and stored in a frost free area for the winter, but I canna see that being much of a problem!