Putting the Bees to Bed for Winter

DSC_0006.JPG

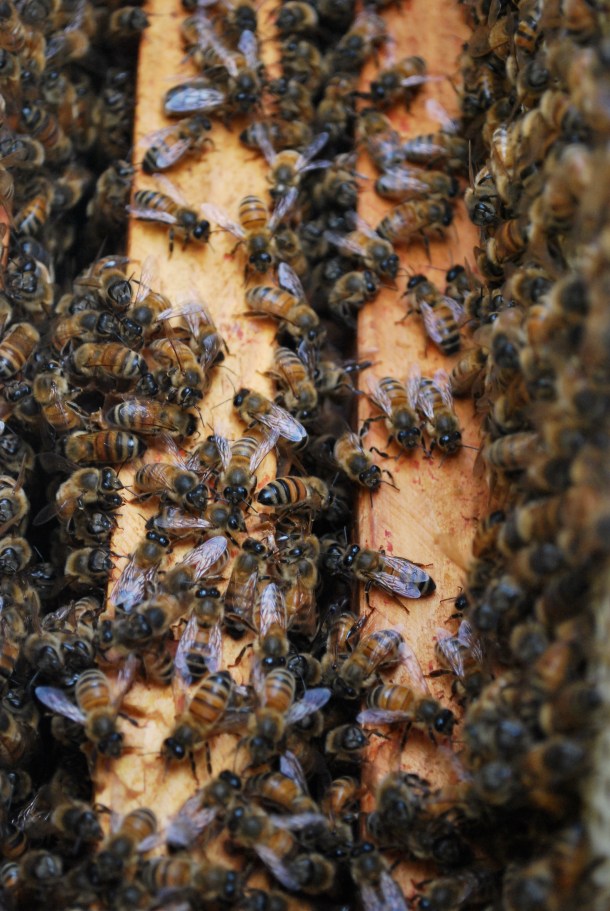
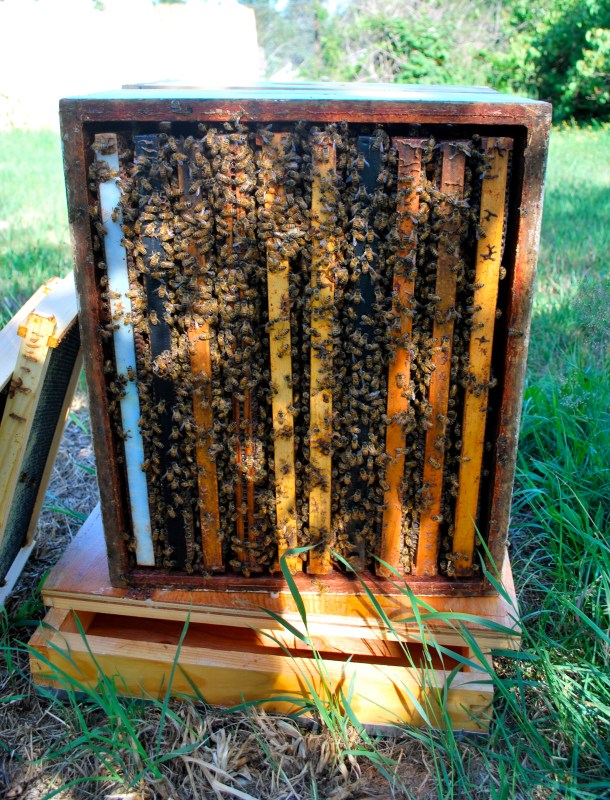
Hive 3, bursting at the seams

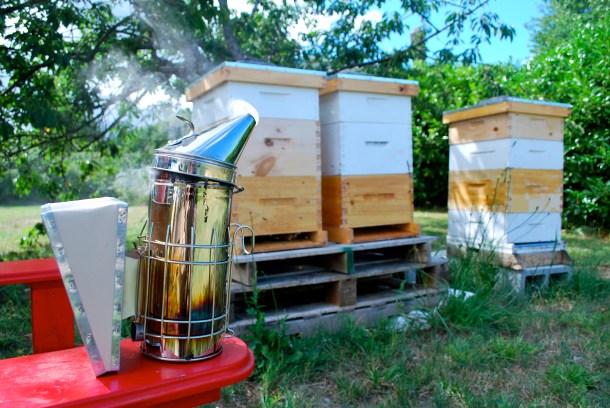
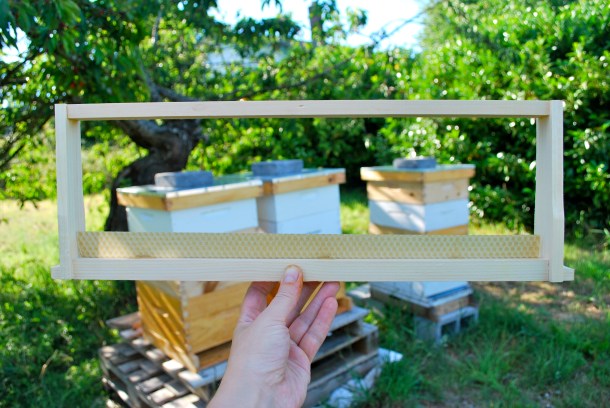
Well, today looked like it might be the last nice day for awhile, so I decided to get my hives set up for the cold season. My plan was to move them a couple of feet forward so they would get a little more sun, check for hive health and honey stores, and remove any supers with undrawn comb. Big job!

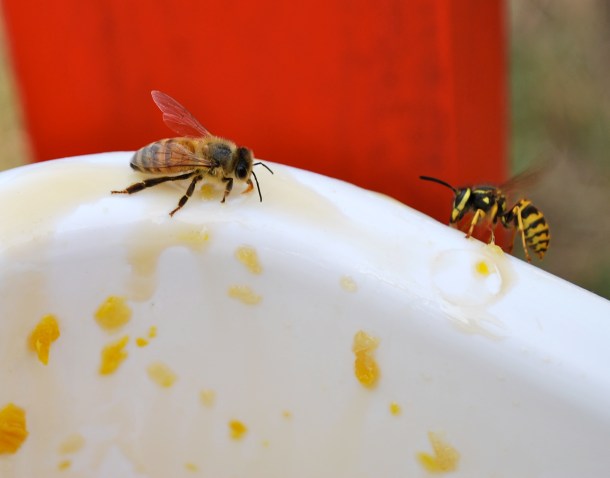
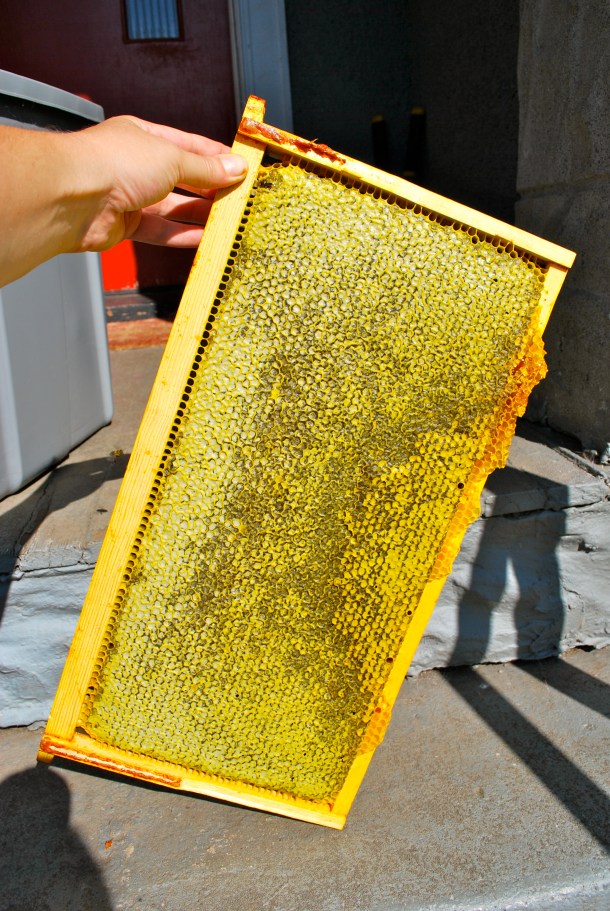
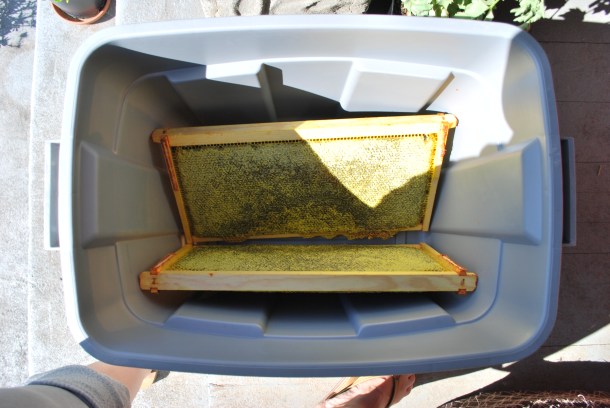
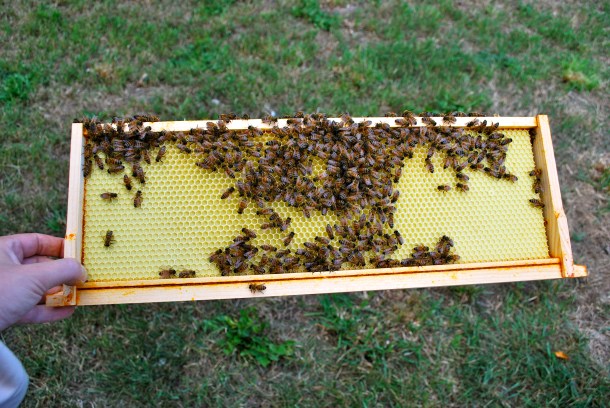
First I opened my nuc hive. I’ve been a little worried about this hive since the population seems to have dwindled and I sometimes see a wasp go inside. Upon opening them though they seemed like they had pretty solid numbers and I returned the two harvested honey frames I took out in August for them to clean up.

DSC_0010.JPG

The girls carrying out wax debris from the harvested frames

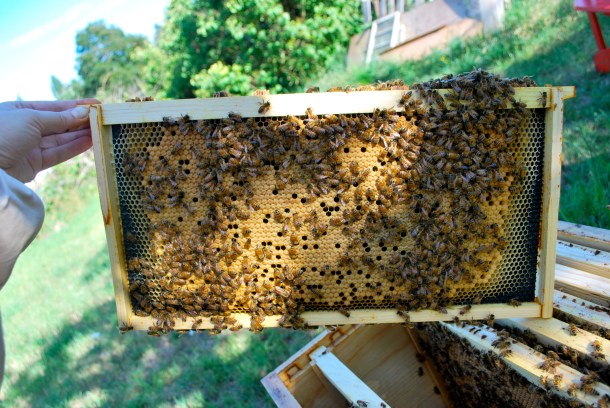
Hive 2, my split hive that kept the original queen was not doing as well as I thought. Here I was thinking they had so much going on that they were overflowing the brood nest into the honey super, when the reality was that their bottom deep hadn’t been touched all year. What the heck ladies? That will teach me not to check. I removed it and left them with one deep and one medium for the winter.

DSC_0004.JPG

Both these hives seemed a bit light to me so I decided to start feeding them. I don’t like to feed if I don’t have to, but I would rather feed than lose hives to starvation. Since it’s fall, they are getting a 2:1 heavy sugar syrup which they will be able to store more quickly since it needs less time to reduce in moisture content.

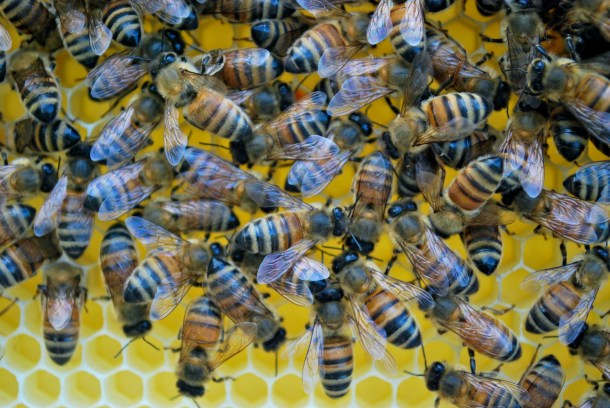
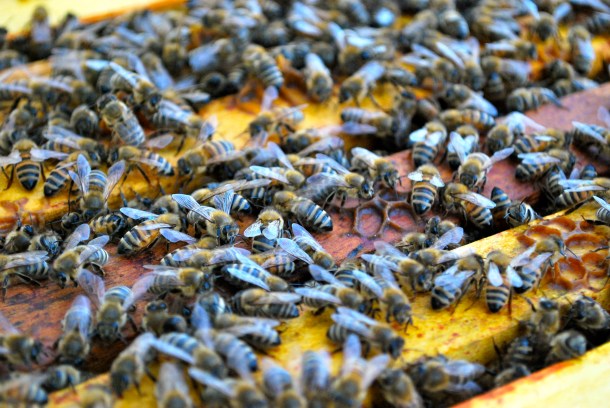
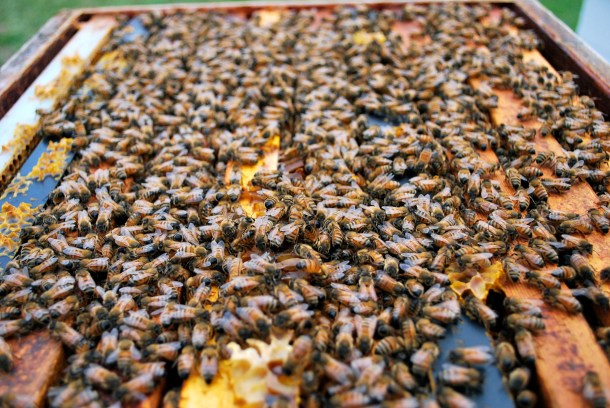
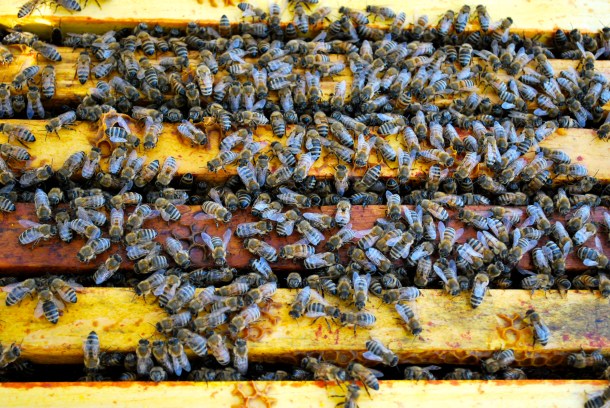
Then we have Hive 3, the one that requeened itself with feral drones. This hive is like a bee explosion went off inside! All three mediums and one deep totally overflowing with bees. Tons of honey and tons of attitude. Working this hive is like dealing with a lion while the other two hives are pussycats. Once I started taking boxes apart they freaked out and all jumped out at me, letting me know how annoyed they were. I didn’t get stung but it was still pretty intimidating! I decided that this hive didn’t really need to be moved two feet and left it in place to avoid total chaos.

DSC_0007.JPG

It was very interesting to me to see how well this locally queened hive has fared this year. They were the ones with the most disadvantage as they had no queen for weeks after the split. Could their extra defensiveness have anything to do with how well they did? At least I can be fairly confident that this large healthy hive will survive the winter. Of course, it also means that I have to deal with touchier bees in spring. In a way I don’t really mind but I’m not sure I would want to give these genetics to a brand new beekeeper.

DSC_0002.JPG

During my inspections today, I still did not see a single hive beetle, wax moth, varroa mite (alive or dead) or any signs of k-wing disease. I know at the last bee club meeting some people reported tons of mites while others reported none. I hope I’m not being naive in assuming my hives are relatively clean. I didn’t treat for anything this year so we’ll just have to wait and see.

A few last things that need to be done before it gets too cold are to put on entrance reducers with mouse guards and construct some top quilts to control moisture. All easy and quick projects.

Supposedly there is some very nasty weather headed our way over the next few days that is projected to be as bad as the worst storm in recorded history in the Northwest. Wish us all luck!

DSC_0003.JPG

How Much Honey is in a Single Frame?

DSC_0001.JPG

I never realized how much honey a single beehive can produce!

Just from one deep frame harvested yesterday using the crush and strain method, I got a total of over 5.5lbs of honey! That’s even after all the honey I managed to eat yesterday during the straining process.

DSC_0002.jpg

Blocking out the sun

As you can see, the honey is very, very dark. It’s impossible to see through even when held directly up to the sun! You’d expect it to be strong-tasting, but it’s not. It’s incredibly light and citrusy. I assume the dark color is because my bees have primarily been foraging on wildflowers. I did notice while processing that the honey at the top of the frame was much lighter, and mixed with the darker honey lower down to produce the final color. Quite interesting.

DSC_0009.JPG

Clean up crew

You’d think honey harvesting would be messy work and it kind of is, but don’t forget that any sticky equipment can be placed out near the hives and the bees (and wasps) will do the cleaning up for you. Zero waste. Honey also cleans up very easily with plain water.

DSC_0008.JPG

Thank you ladies!


First Honey Harvest!

DSC_0003.JPG

I decided to go into hive 1 today, the one started from a nuc this year, as last inspection it looked like they might be honey bound.

DSC_0011.JPG

They were. Although I did find a little bit of capped brood in the top deep, all available cells were quickly being filled up with nectar and there was nowhere left for the queen to lay. Since I need her to rear bees now so we’ll have bees to overwinter, I decided to free up some space. I know I said before that I wasn’t going to harvest from this hive this year, but that honey had to go somewhere!

DSC_0008.JPG

I decided to remove two deep frames that were completely full of capped honey. I also did some rearranging of the frames in the two deeps and added two fresh frames with foundation into the brood nest for them to get started on. I would have used foundationless, but so far all my deep frames have plasticell foundation, so I guess it needs to be used somehow. Here’s hoping they’ll draw it out quickly and give the queen room for more egg laying.

DSC_0014.jpg

I  shook off as many bees as possible and brushed the stragglers off with a bee brush. It was fairly straightforward and the bees were not too agitated. The frames weighed probably about 8-10 pounds each and I transferred them to a clean, lidded Rubbermaid bin once they were free of bees.

DSC_0013.JPG

Once inside my kitchen, I scraped off the comb into a large container with a wooden spoon, and then strained it through a stainless steel sieve into jars. It is a very dark colored honey on very yellow wax.

DSC_0017.JPGDSC_0018.JPGDSC_0019.jpgDSC_0020.JPGDSC_0021.jpgDSC_0025.JPG


I have to admit, I’ve never been a huge fan of honey and I don’t eat a lot of it. It always seems to have a bit of a strange aftertaste to me. The harvest from one frame is more than I generally consume in a year. Well, I’m now a fresh honey convert. This is the most delicious honey I have ever tasted! It’s tangy, floral, citrusy and light with no weird metallic aftertastes. I could see myself eating it out of the jar with a spoon and wanting to drizzle it on everything. I managed to spill a drop on the counter where it hit a stray szechuan peppercorn from an earlier recipe, and it was an amazing combination! I even drizzled some on the soft boiled eggs I had for lunch and it was divine. Apparently fresh honey goes with everything!

I’m so excited to have some to bring with me to share with my family on my upcoming Seattle trip!

DSC_0034.JPGDSC_0028.JPGDSC_0029.JPG

DSC_0031.JPG

Hive Inspection: Our First Honey!

DSC_0016.JPG

Decided to open the hives up today and see if anybody needed a new honey super. It’s hard to believe I’ve only had my bees for two months, it sort of feels like I’ve always had them. They are so fascinating to observe and learn about.

DSC_0030.JPG

First up was the hive I started from a nuc in May. They got a new honey super last week with mixed plastic foundation and wax starter strips. I was hopeful they had done something in there during that time, anything, but they haven’t touched it.

DSC_0034.JPG

I didn’t want to disturb them too much but I did notice lots of capped honey on the tops of the brood frames below, so they’re not doing absolutely nothing. The outer frames of their top deep brood box are still only half drawn as well, but coming along. I decided to start feeding them 50/50 sugar syrup again just so they can get a boost on beginning to draw out that comb.

DSC_0020.jpg

Finally drawing out the outer brood frames


DSC_0021.JPG

Just getting started on this medium frame

I’ve read that the pH of sugar water is around 6.0, while the pH of nectar is closer to 4.2. This imbalance can cause health problems for the bees so it’s best to keep feeding to an absolute minimum. I’ll probably feed this hive until they get their honey super comb well underway and then stop for good unless the bees are starving. Once I have some reserves of drawn comb to fall back on, I’ll be in a much better position.

DSC_0024.JPG

The two split hives on the other hand were doing great. Both honey supers that were added back in May are almost completely full of honey! I’m realizing now the wisdom of those who told me that switching to all medium boxes is the way of the future. Even a single medium frame full of honey is surprisingly heavy!

DSC_0047.JPG

Some uncapped nectar

DSC_0049.JPG

Look at all that capped honey!

DSC_0059.JPG

Om nom nom

I might harvest a frame or two of honey this year, but for the most part I’m expecting to leave it for the bees since this is our first year.

I’ve been learning about the natural beekeeping method spoken about by Michael Bush, which is based on not treating bees and instead allowing weak bee genetics to die out and strong/hygienic genetics to take over. He makes a good point when he says that treating varroa mites only selects for stronger varroa and weaker bees. The theory is that if everyone stops treating for varroa, the bees will adapt within a few years and it will never be a serious problem again. Of course a lot of bees will die initially, but those are all bees with weak genetics anyway.

When the tracheal mite became the latest new threat to beekeeping back in the 80s, many beekeepers began treating for them. As soon as varroa came onto the scene, they stopped treating for tracheal so they could treat for varroa, and the losses from tracheal mites resolved itself quite well in just a few years. Now nobody really treats for tracheal mites.

The ecology of a beehive contains many microorganisms other than just bees, including a documented 170 types of mites. Damaging that ecology with pesticides and antimicrobial essential oils doesn’t make a lot of sense to me. I’ve made the decision to attempt to go treatment free with my hives and see what happens. I’ve already secured a few potential sites in friend’s yards so if I need to boost my hive numbers to ensure survival, that’s just what we’ll do.

DSC_0051.jpg

All (Queen) Right!

DSC_0010.JPG

Look at all the beautiful brood!

It’s been a little less than a month since I did the walkaway split with my largest hive. I had intended to check it at two weeks, but tax paperwork, weather and farm chores all got in the way. All three of my hives looked busy and healthy from the outside so I just let them “bee”.

Today was a beautiful sunny day and I decided it was time to open everyone up and see what the situation was. First I opened up the hive that I started from a nuc back in May. They were doing great, lots of bees, lots of brood, lots of honey. No problems there.

DSC_0007.JPG

This hive is so gentle it’s like they don’t even realize I’m there. Not to mention it’s nice working with a hive that’s all fresh new woodenware and frames. They were getting pretty full so I gave them a new honey super with half plastic foundation and half beeswax starter strips. The frames with foundation will hopefully help to keep the comb on the foundationless frames straight. I’m excited to see how the frames with the strips work out because I’d rather move away from plastic if I can. The beeswax strips are cheap, easy to install, and will allow the bees to build any kind of comb they want. If they want to fill it with drone comb, they can bee my guest. I just want it built straight!

DSC_0010.JPG

The starter strip is taken from a sheet of Dadant size wax foundation. I can get five 1 1/8″ strips from one sheet so two sheets will do all ten frames. The strip is secured by dripping wax from a beeswax candle into three spots and holding the strip straight until they harden. Easy. Plus this way I’ll be able to harvest some comb honey at some point which is the ultimate goal.

DSC_0008.JPG

Next I opened the hive that I suspected had been the queenless half of the split. Same thing, lots of bees, a beautiful brood pattern and eggs and larvae in all stages. I did also find what looked like a single opened queen cup. Didn’t see the queen, but I know she’s in there doing a fantastic job.

One thing that concerned me a little was the condensation building  up under the lid. Just another reason I would like to build and install some top quilts before winter as well as look into some slatted racks and screened bottom boards. I think more ventilation will be a good thing.

DSC_0001.JPG

You can see a few empty queen cups

Hive three had been the stronger side of the split, with two full boxes of bees to start off with. I had assumed the queen was in this hive, but when I opened it up there were a good dozen or so queen cups that were long empty. This hive was the least gentle of the three, which wasn’t to say they were aggressive, just a little more upset that I was taking their house apart. It could have been partly because there were quite a few frames sticking together when I lifted the top boxes off and they shifted around a little. Also maybe because my smoker was kind of puttering out by that point. Still no stings so I’m not complaining.

DSC_0009.jpg

Hive three looked pretty darn good! Tons of capped brood in a good solid pattern and lots of honey, even though this was the hive I hadn’t fed.

I did a cursory inspection for varroa mites, and couldn’t see a single one clinging to any bee in any of the hives. Once I get my screened bottom boards I can do a 24 hour mite check and that will help determine if I need to treat before winter. I think I prefer the method of allowing the bees a frame to build up with drone comb, and then just freezing it once it’s filled with brood. Varroa mites prefer drone brood because their gestation is longer, so that’s a good natural method of control.

Once again I didn’t use my gloves today. When gloved fingers get covered with propolis and stick together, it can be dangerous and I almost dropped a frame the one time I did use them. I suppose my hands are now stained orangey-yellow for awhile, but maybe the propolis will help to heal the dozen or so barn owl bites I got from gearing up an uncooperative male with his transmitter yesterday!

DSC_0005.JPG