Many designs for chick brooders exist out there, but most of them are high-maintenance, hard to clean, or labor intensive to construct.
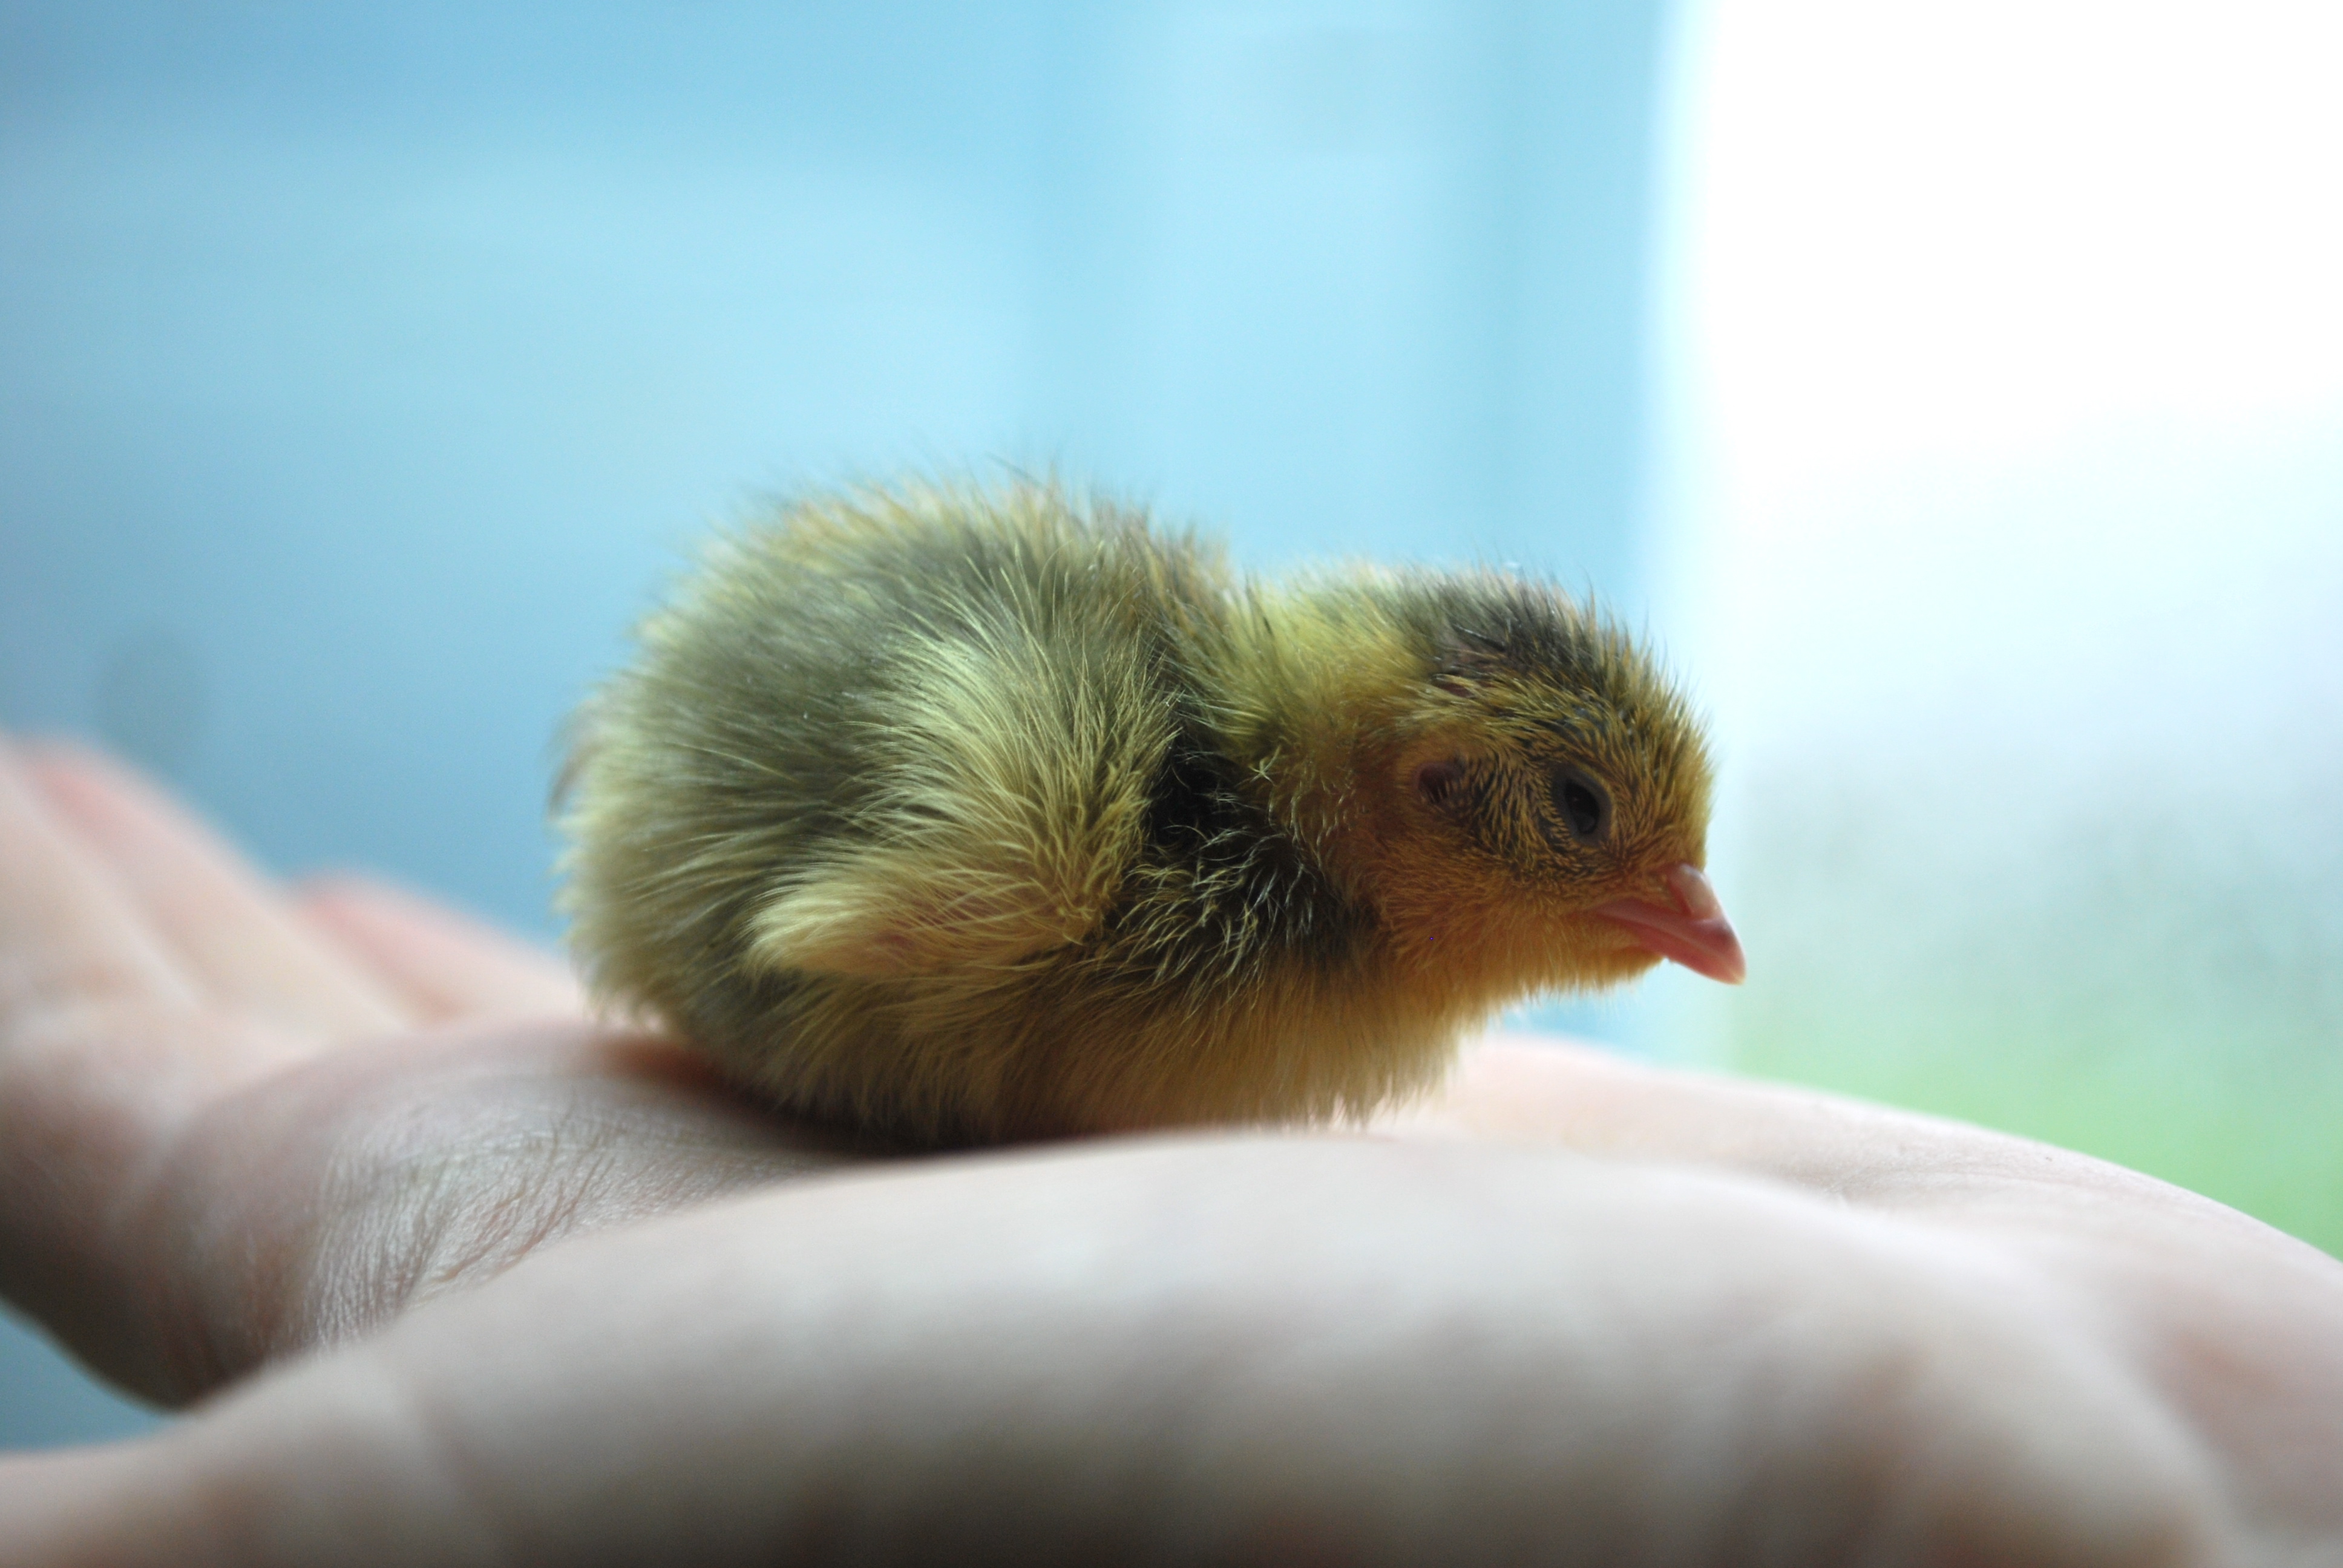
I’d like to share with you the best design I’ve come up with for brooding very small quail chicks (or chicken chicks or ducklings). The parts are cheap and easy to put together and clean, the water stays crystal-clear without drowning incidents or changing five times a day. The chicks stay healthy and there is a minimum of care involved.
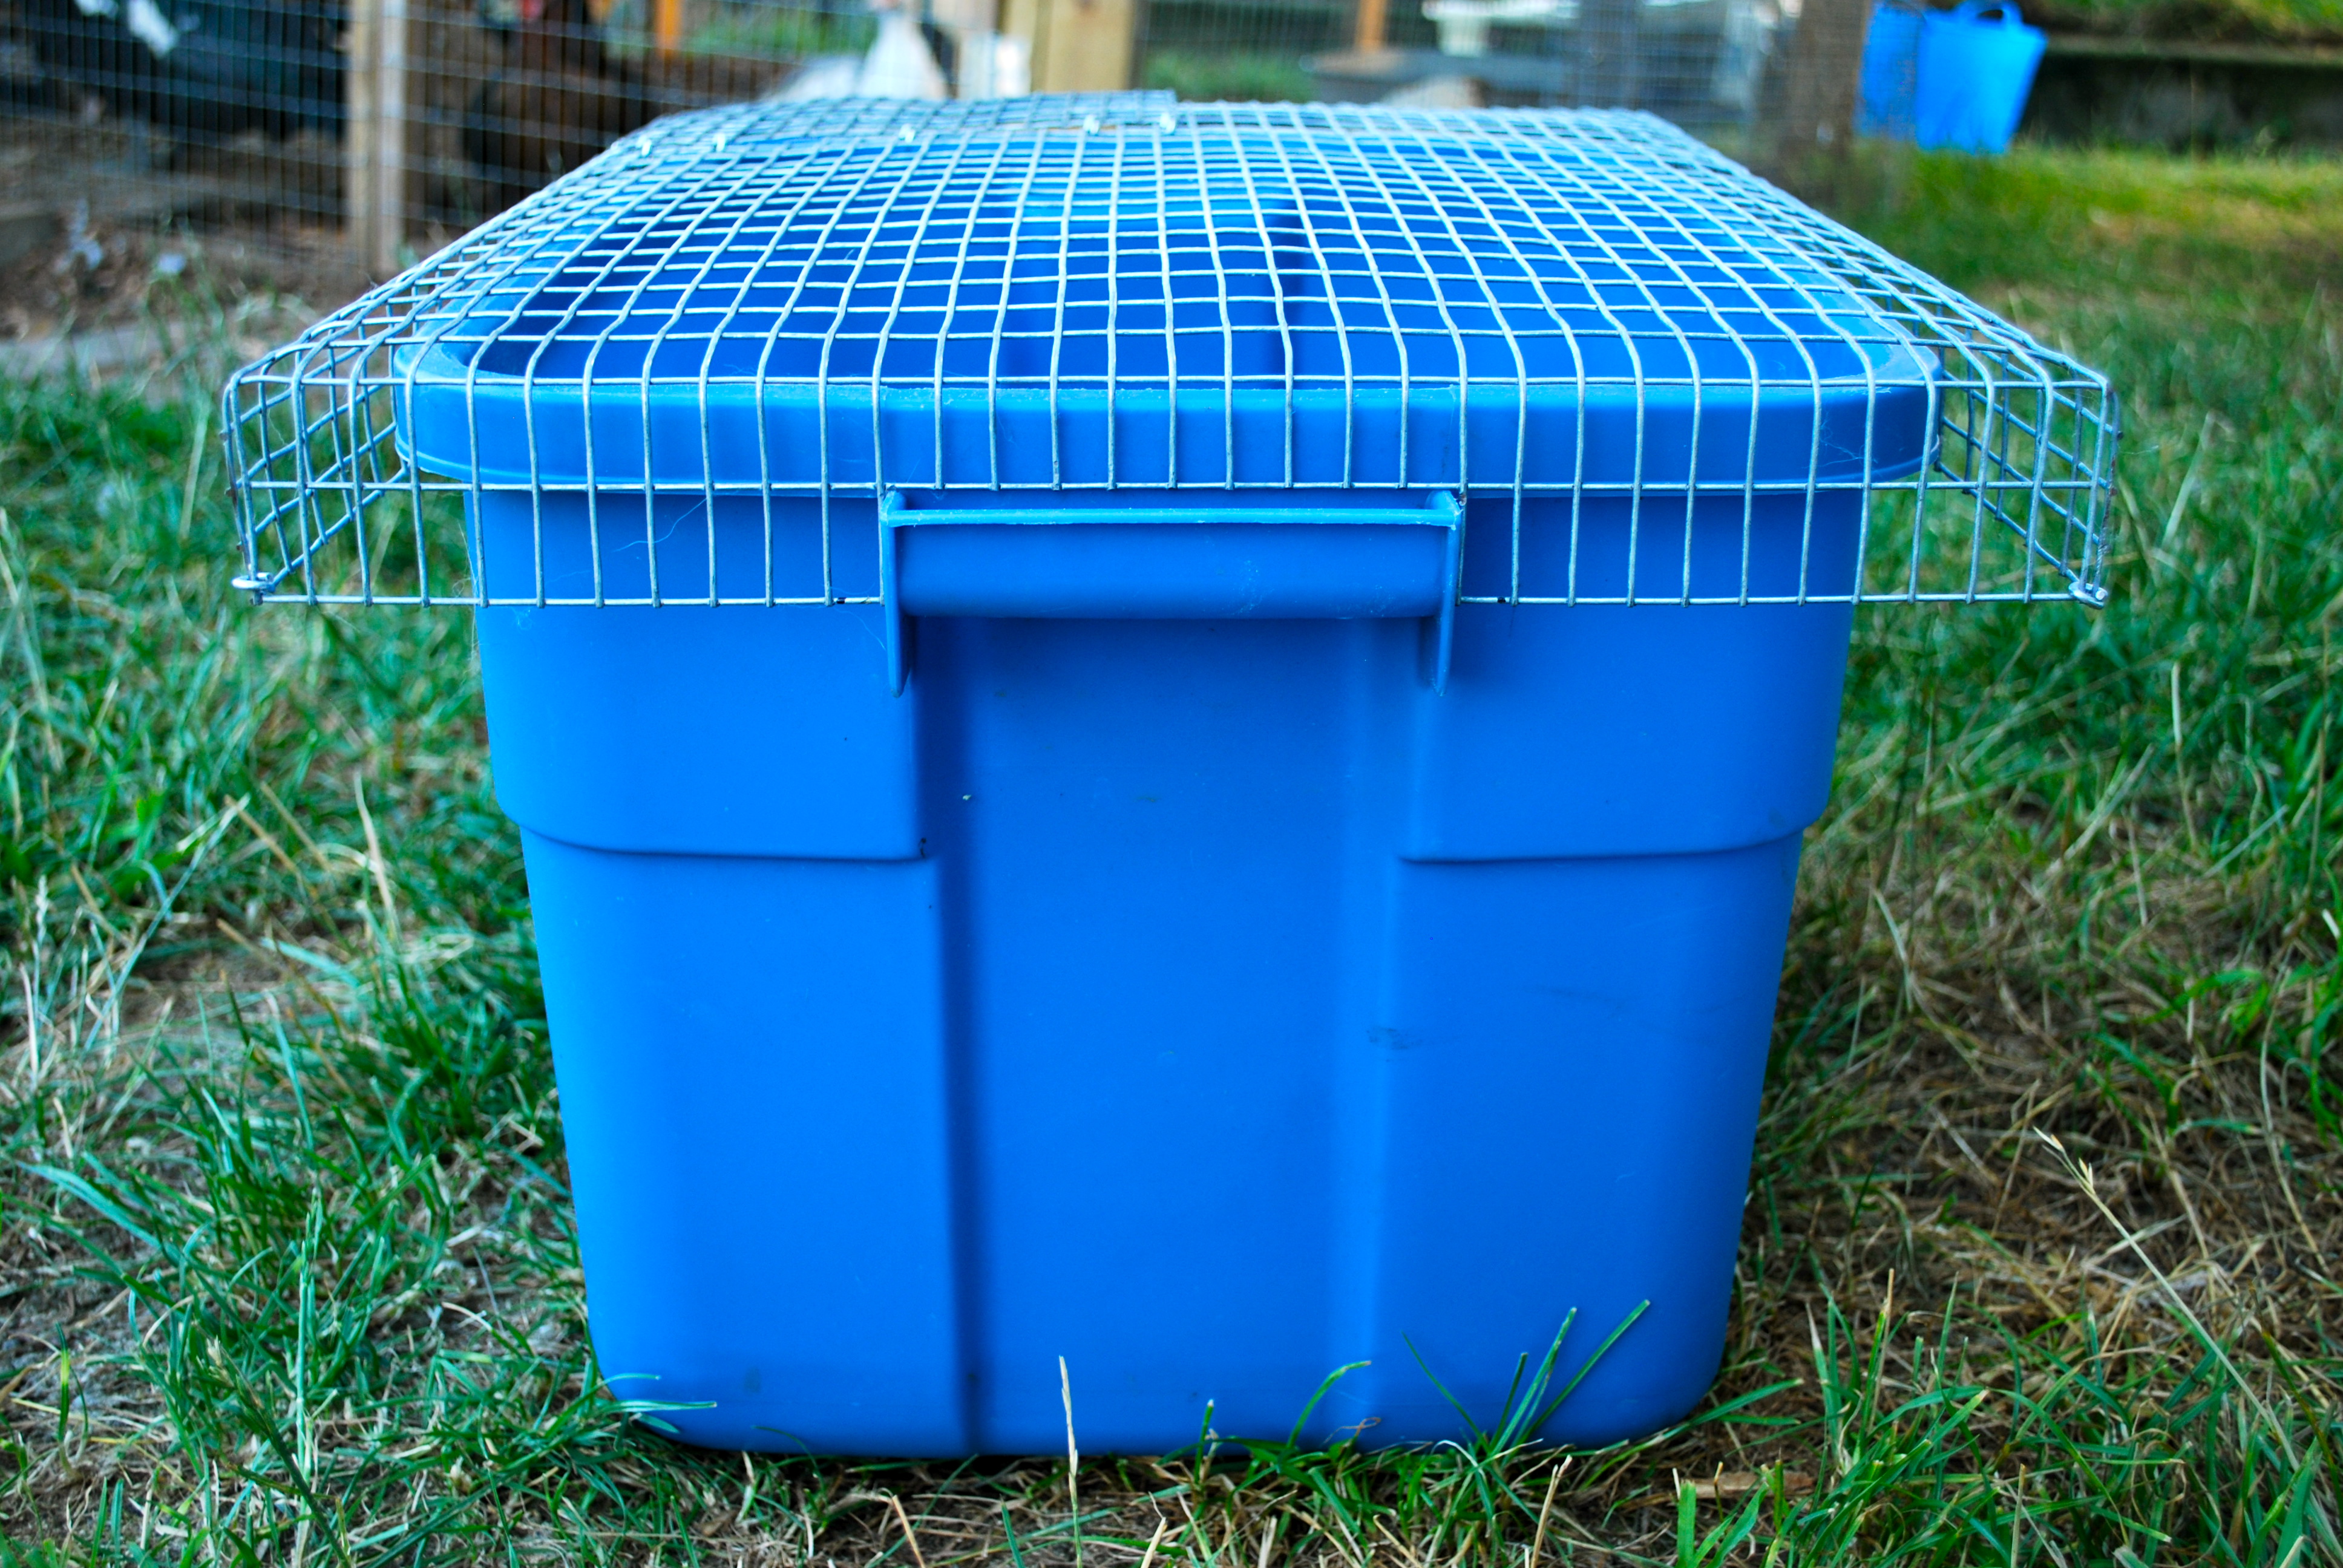
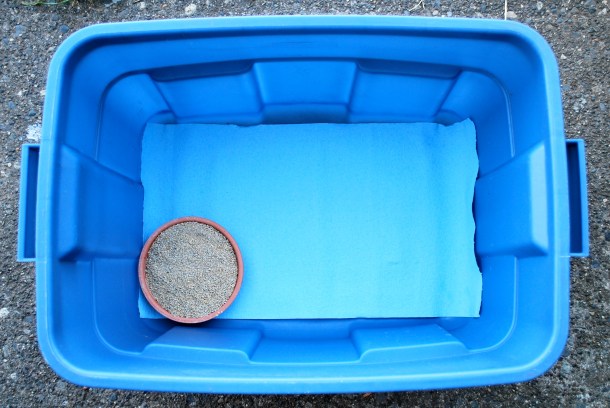 You start with a standard Rubbermaid bin, the one foot tall size works best. Remove the lid and store it. This gives you a nice solid-walled brooder that will protect the tiny chicks from drafts which can chill them. If you decide at some point that raising chicks is really not for you, you still have a usable bin.
Line the bottom of the bin with shop towels (as seen here) or paper towels. Anything slicker, even newspapers, will cause traction problems and you could end up with spraddle-legged chicks who will not survive. Place a shallow saucer of food and also sprinkle some food around on the floor of the brooder so the babies can easily learn to peck at the pieces.
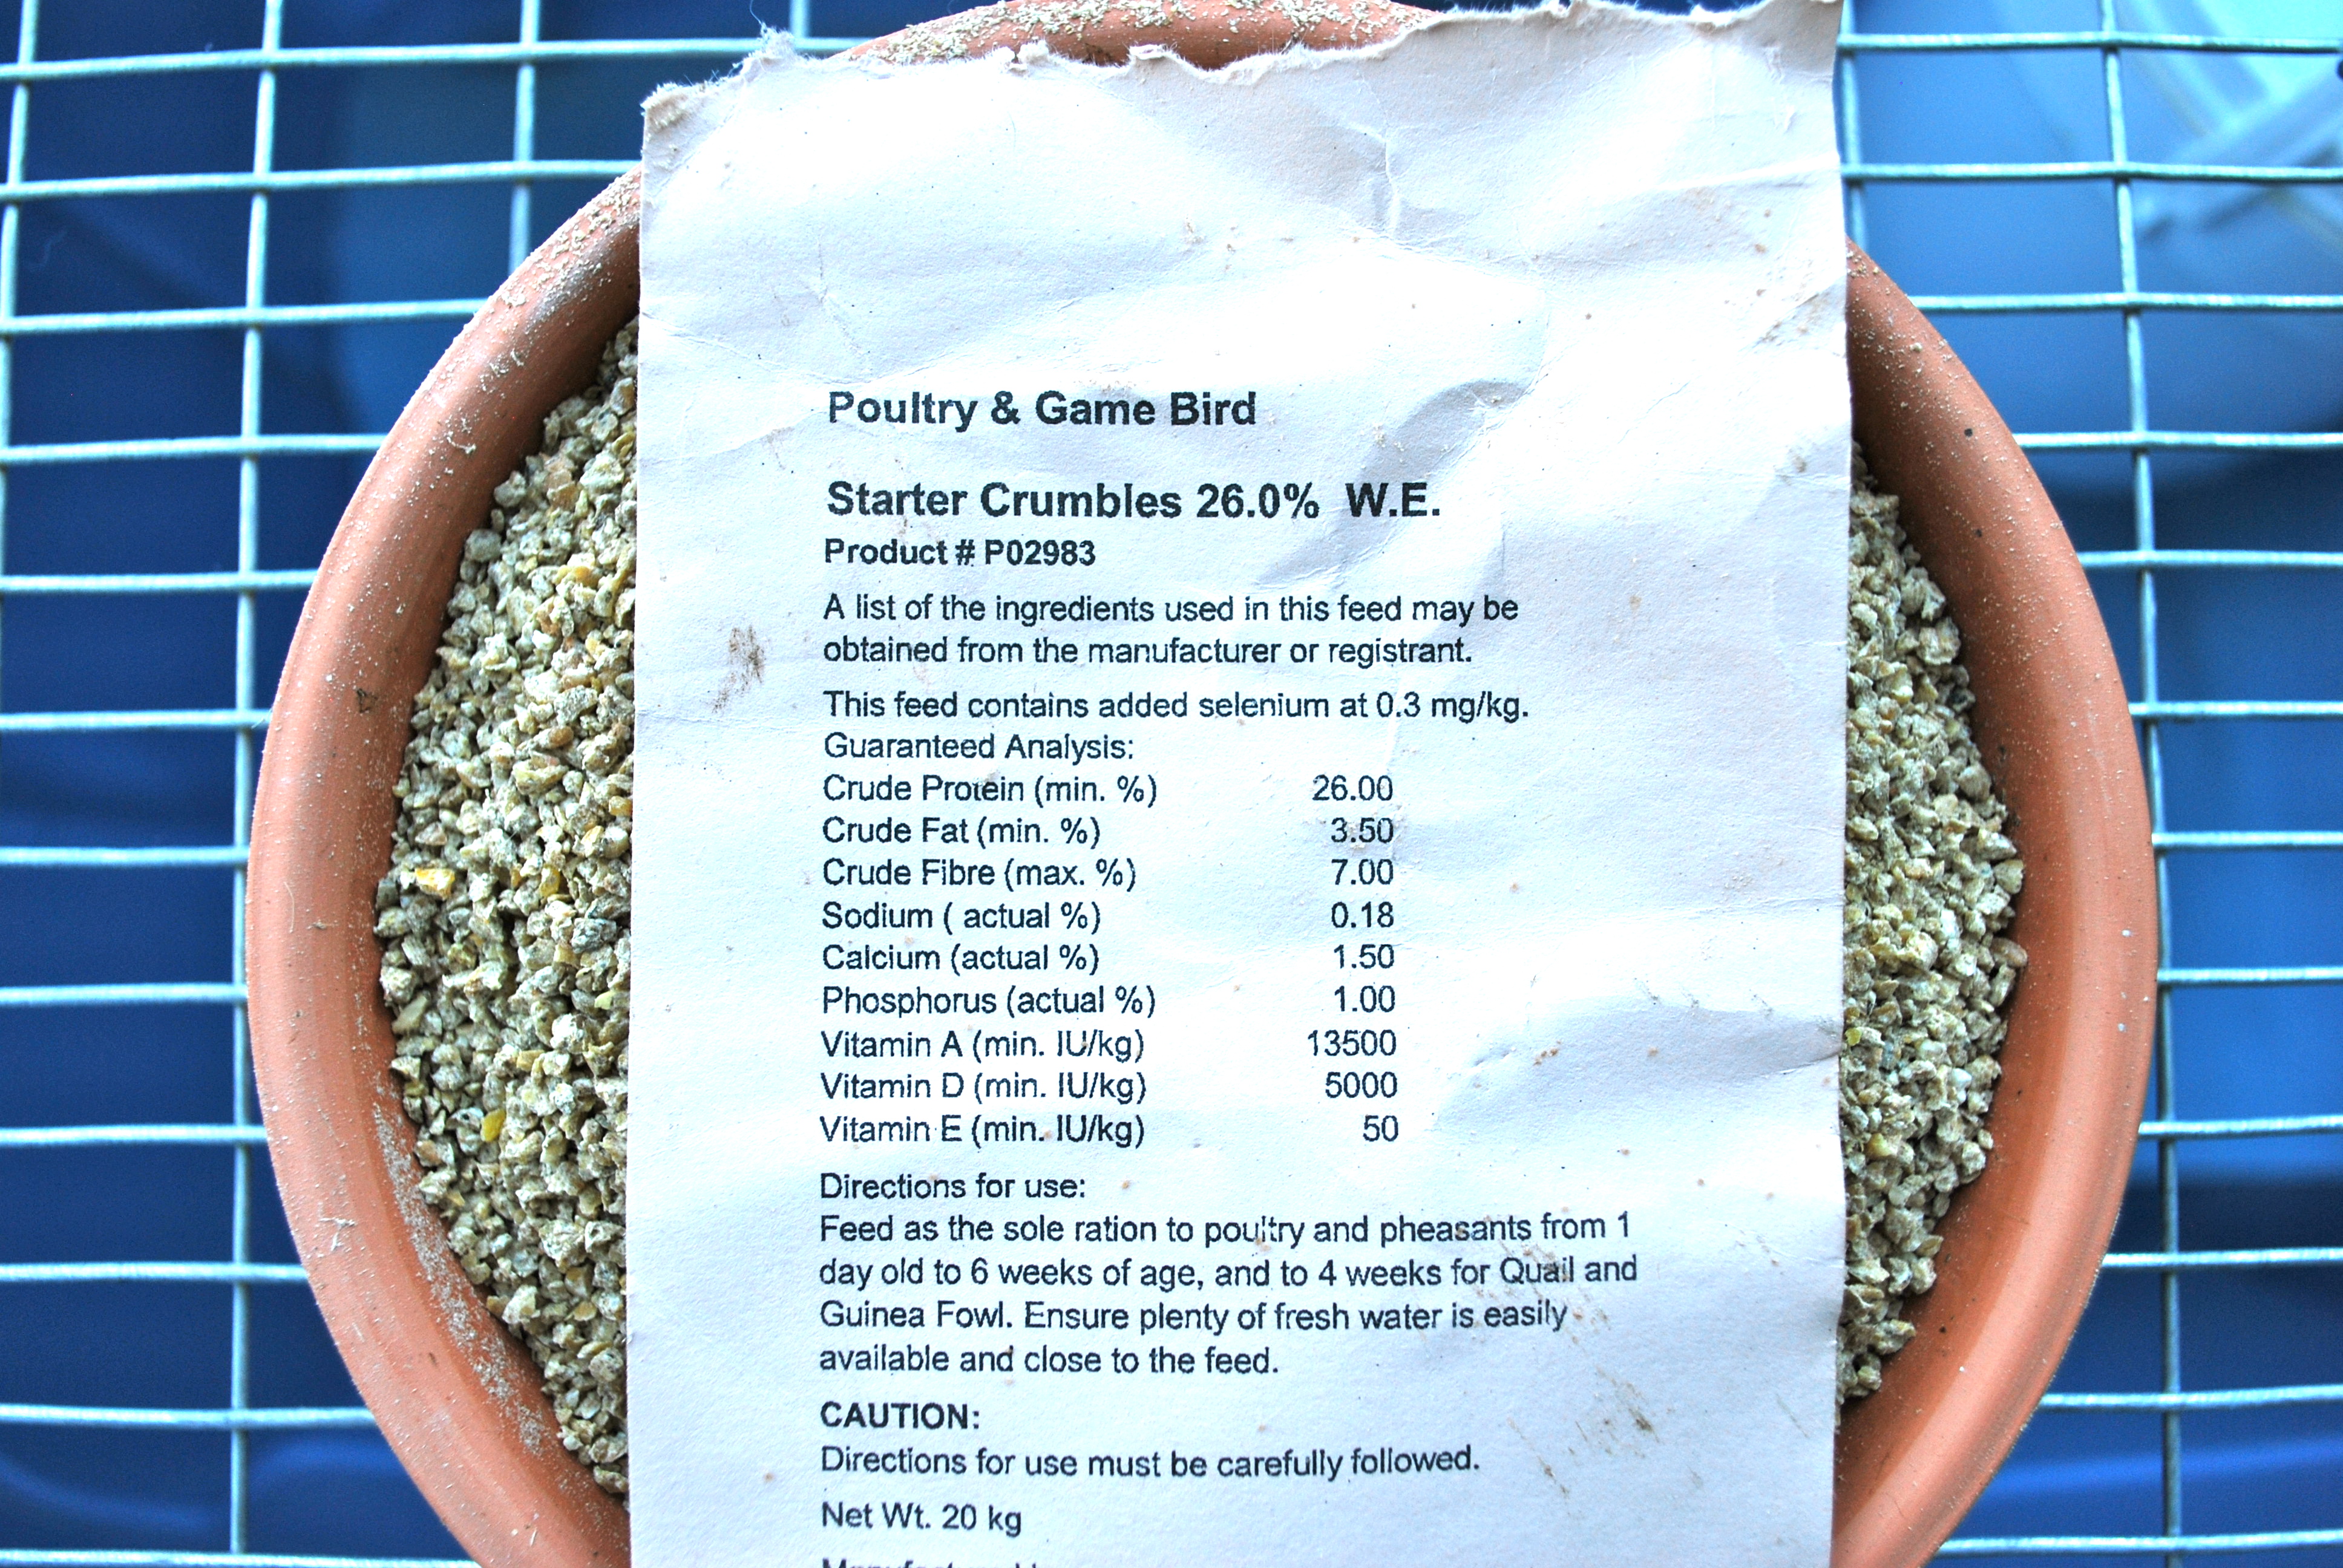
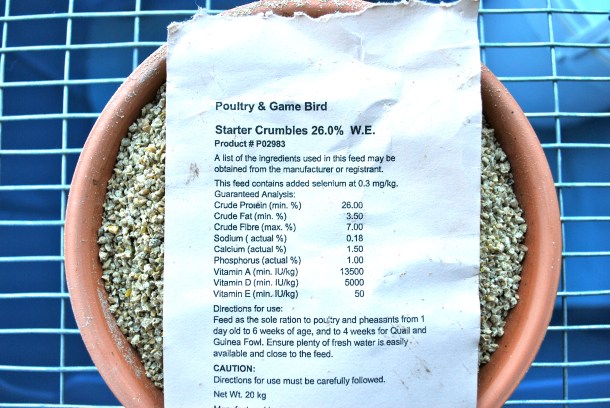 Nutrition is very important. Quail grow incredibly fast and will run into problems if fed incorrectly. I use a 26% gamebird crumble throughout their lives and they do very well on it. You don’t need to pulverize the crumbles, the chicks will find pieces small enough to eat.
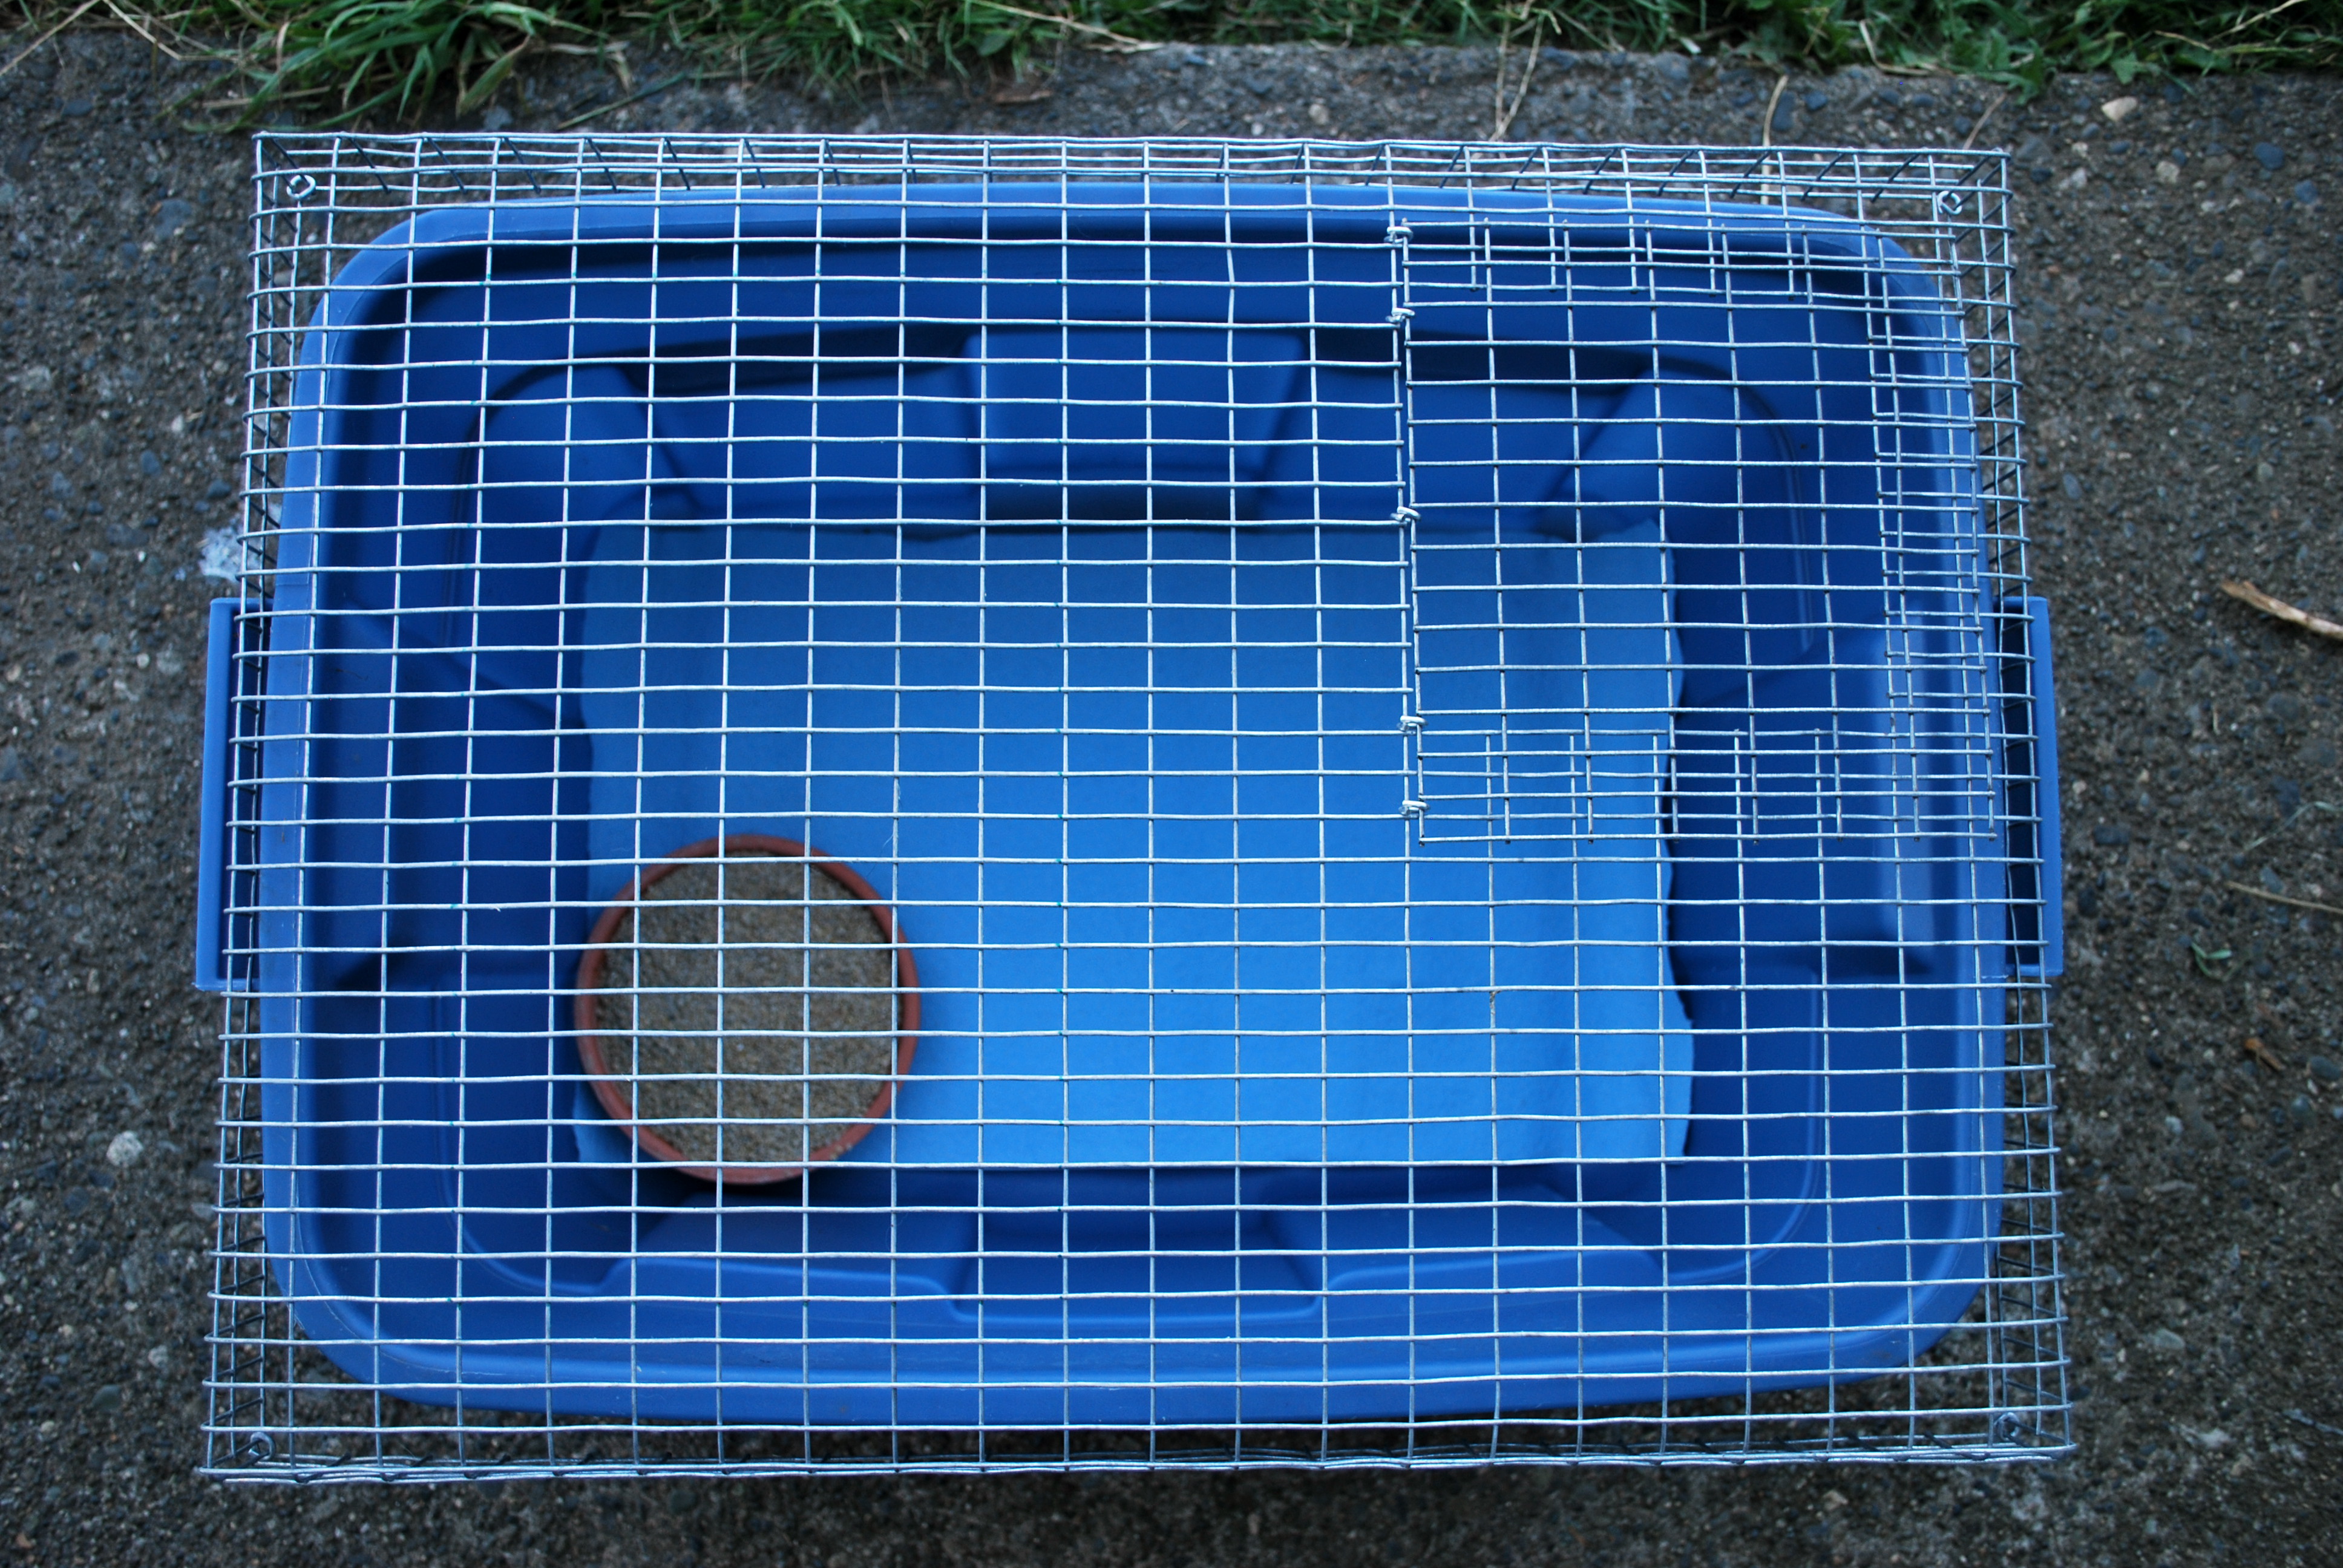
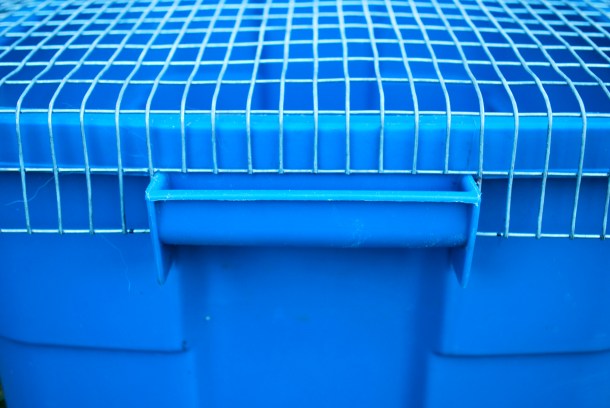
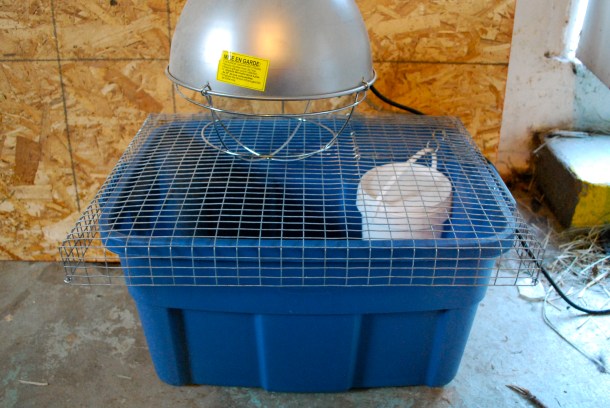
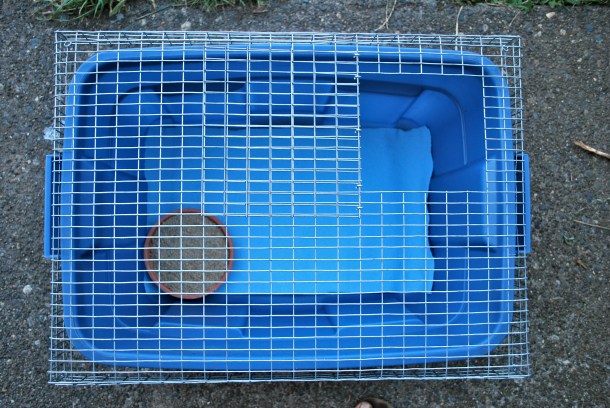 Now you need to create a mesh top for your brooder to provide ventilation, keep quails in and prying fingers and paws out. I created this top easily using a piece of 1″ by 1/2″ galvanized wire mesh, normally used for rabbit cage flooring.
Cut a piece that is 26 inches long by 20 inches wide. Remove a 2″ square from each corner so you can bend the sides to form an overhanging lip. Use a piece of 2 x 4 lumber as a guide and a hammer to bend your sides up at the seam and fasten the corners together with small hog rings or j clips.

 Next, cut out two 5″ by 1″ slots in the center of each short side to accommodate the handles. If you bent your sides and corners neatly, everything should fit perfectly.
Brooder with drinker flap open
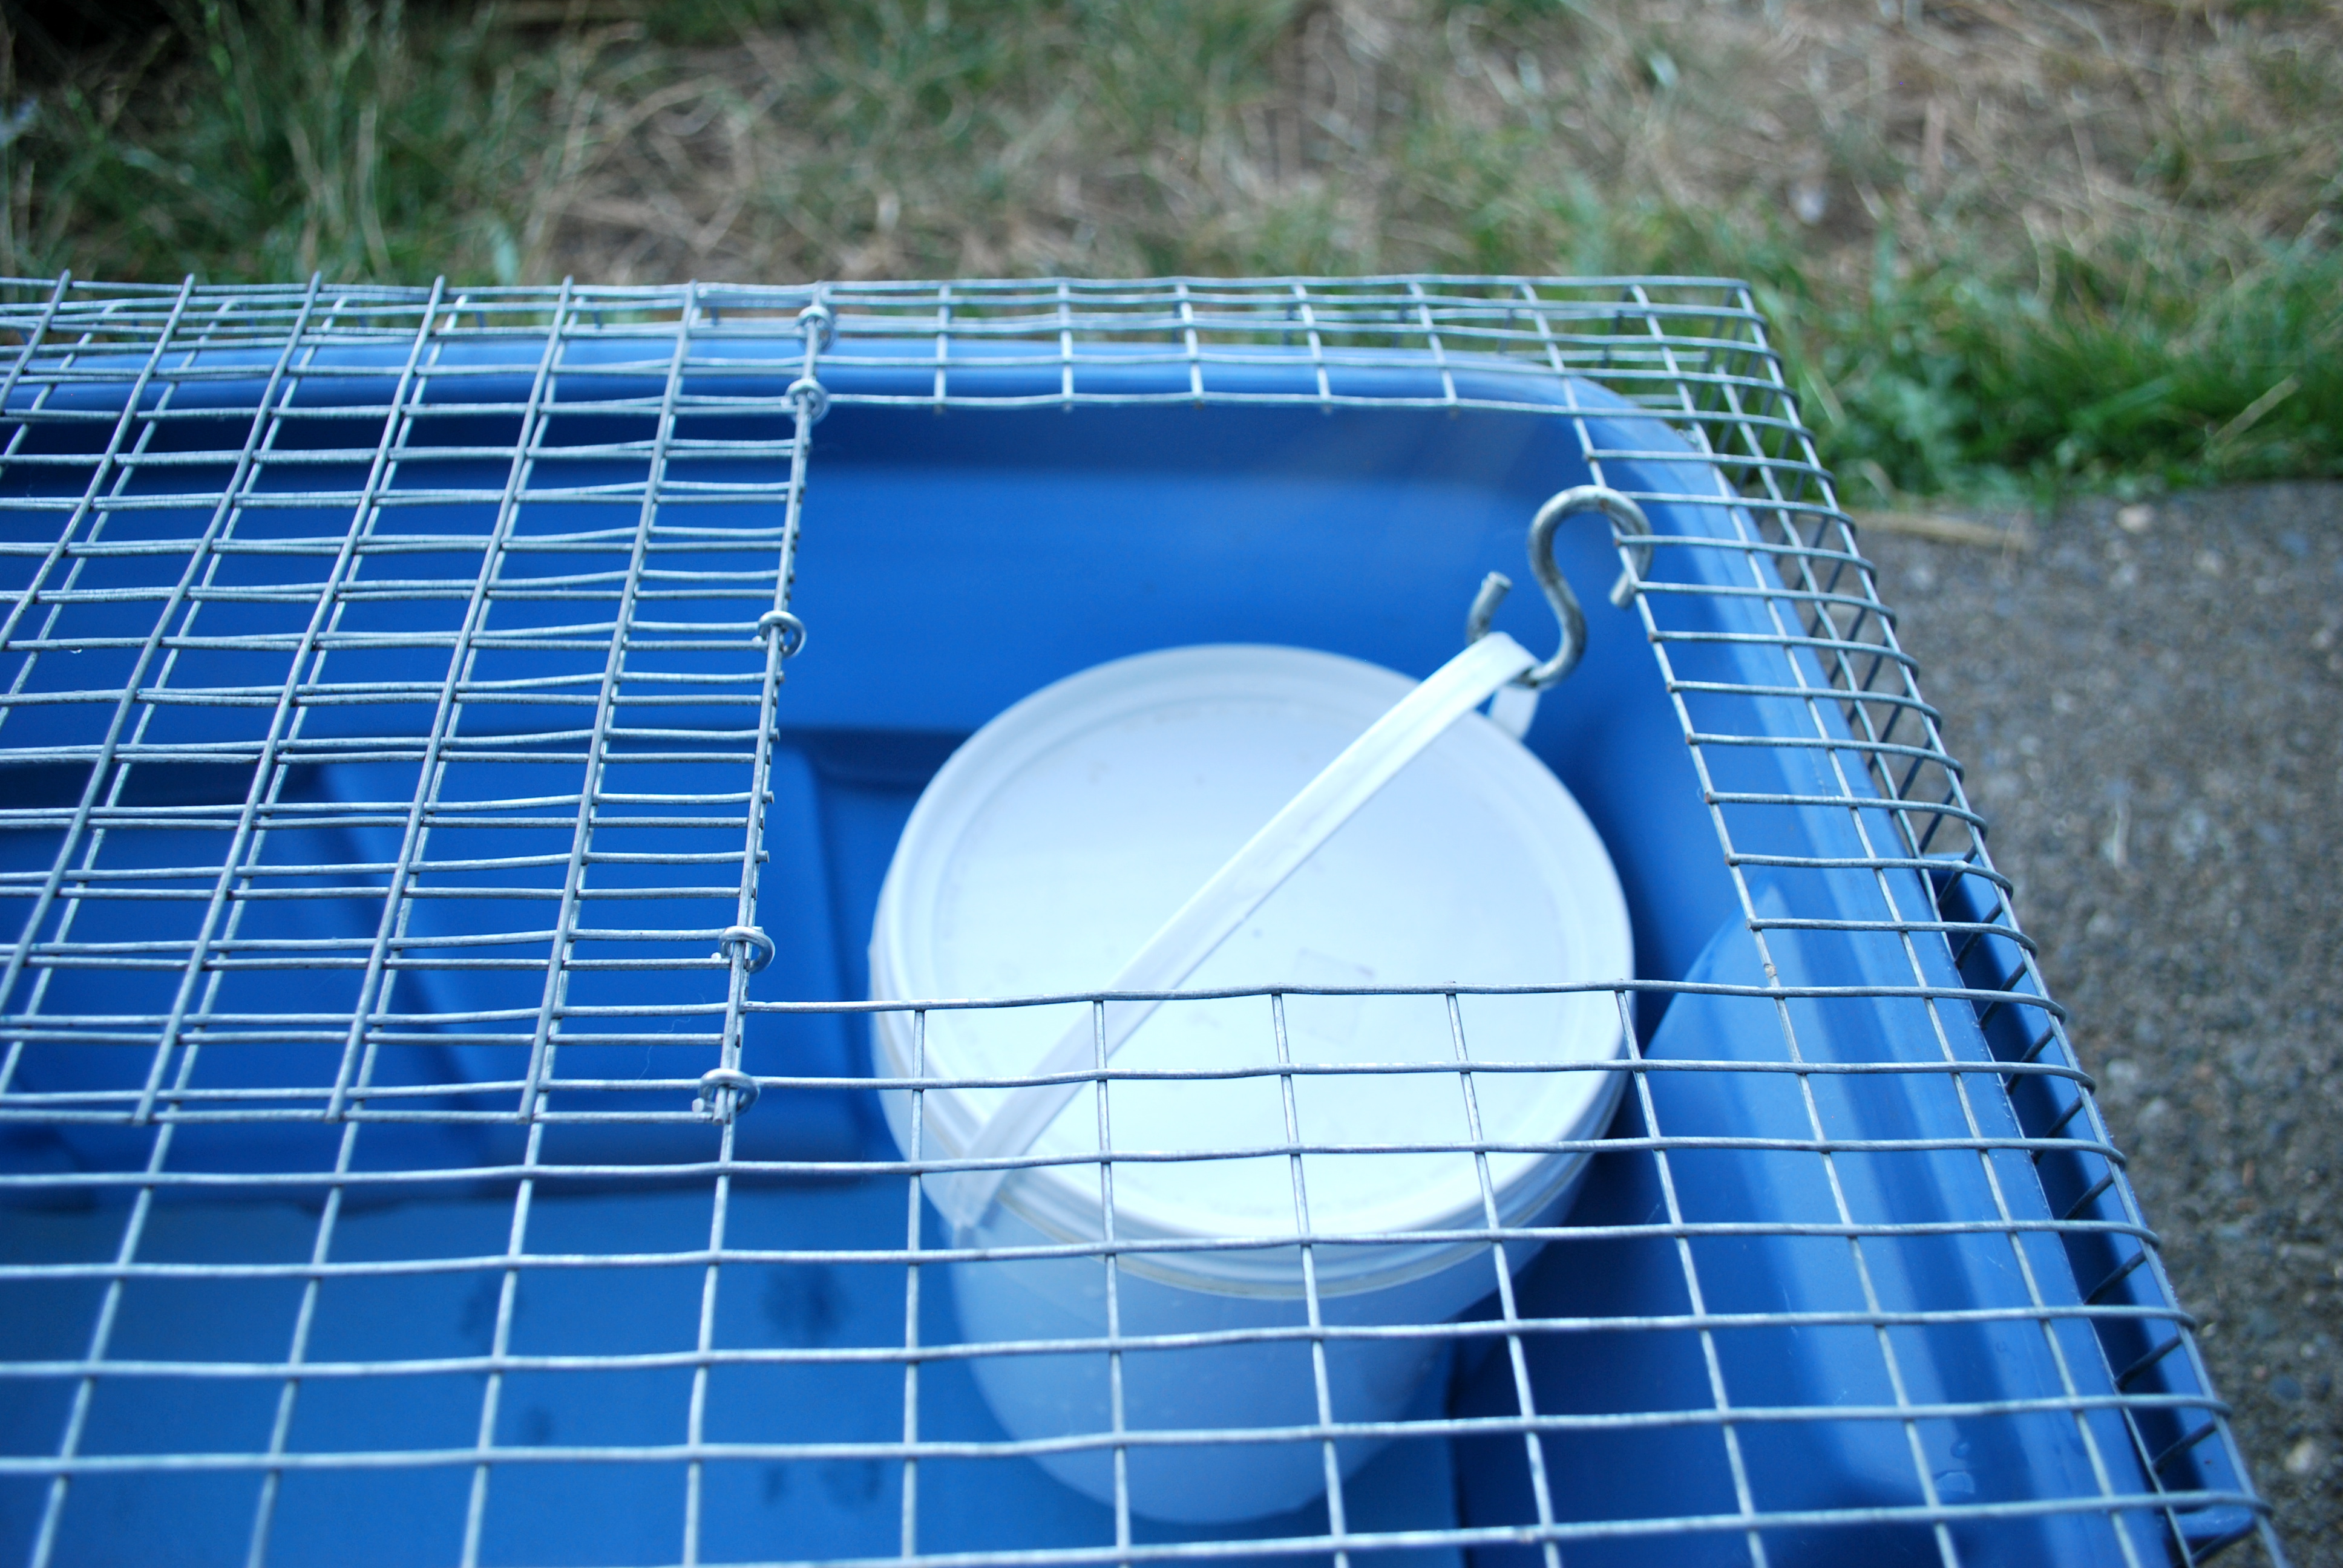
Next you want to cut out a square in one corner to accommodate your drinker or waterer. You will need to customize the size of the opening to fit whatever container you use. Then cut a square that is 1″ larger on three sides to fit over the opening like a flap. Connect at the hinge with more hog rings.

Brooder with drinker flap closed
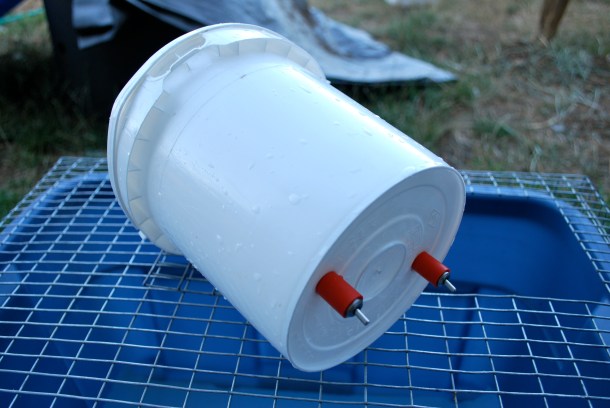
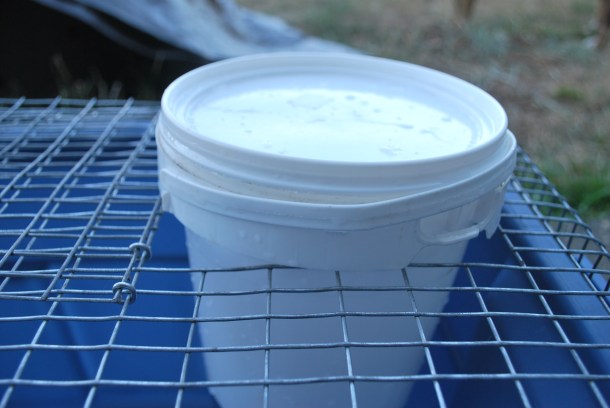
Now you need to construct your waterer. Mine is made from a small plastic honey specimen bucket with a lid, but you can use any small plastic container with a lid such as a clean, large yogurt container. As long as you can fit your hand inside to install the nipples it should work. If it has a handle, even better. If not, you may have to add one with a piece of wire or cord.
I find that two nipples are sufficient for the amount of quail that can fit in this small brooder. Make sure you buy high quality nipples as the cheap ones may leak and/or fail. These ones cost me over $8 each, but they’re worth it. Install your nipples carefully and test to make sure they are working and not leaking. To install, just drill a hole slightly smaller than the nipple and push it in tightly. Always retest your nipples when refilling to make sure they are still functional.
Chick drinker with nipples installed
Drinker supported by mesh lid
Your drinker should fit snugly over the mesh and hang inside the brooder. When the chicks are very small you will need to adjust the height, beginning with having the nipples only an inch or so above the floor. To do this you will place the drinker inside the brooder and hang it from the mesh at the suitable height with S hooks.
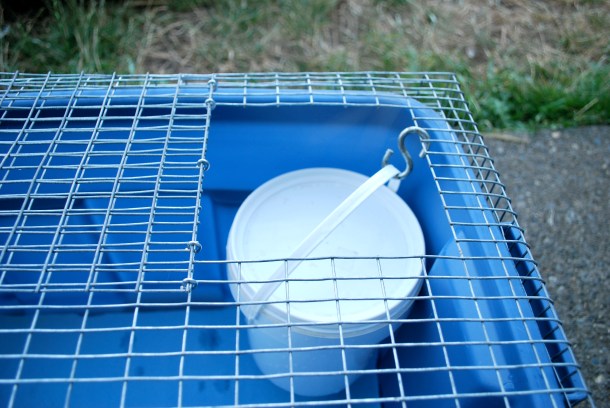
Drinker height adjusted for newborn chicks

With safety flap closed
Now you just need to add a heat lamp overhead at the correct height and fill up your waterer. You can see my heat lamp has a metal safety grille which needs to be removed as the chicks need the bulb itself quite close to the mesh top for the first week or so.
The chicks learn very quickly where the water is and it won’t need to be refilled for at least a few days and up to a week. The water will stay sparkling clean with almost zero maintenance. An added benefit is it provides a small shaded area for overheated chicks.
Ready for new chicks!
This size brooder will hold approximately 60 quail chicks (at an absolute maximum) for the first couple of weeks. The chicks will tell you if they are too hot or too cold so pay attention to the noise they make and their activity. Make sure the heat lamp is not placed directly above the water as chicks don’t like water that is too warm. Also keep it away from the sides of the bin as they may melt.
As the chicks grow and poop, add layers of woodchips (not cedar) or wood stove pellets to the floor and adjust the drinker height accordingly. I don’t clean out my brooder until the chicks are taken out, I just add more bedding as needed.
If you have any more questions about brooding Coturnix Quail chicks, ask me in the comment section below or check out my Coturnix Quail Chick Care Sheet. Happy brooding!