Preparing Muscovy Duck Feet

DSC_0003.JPG

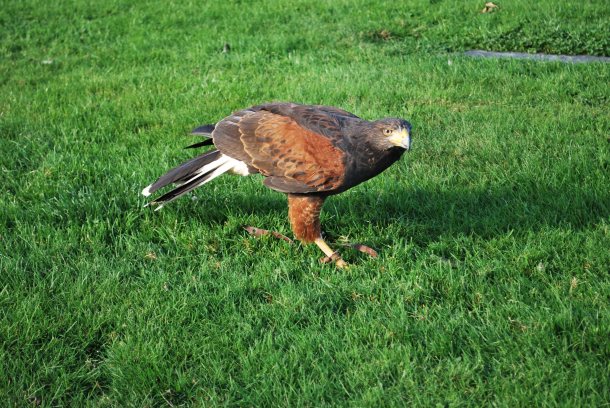
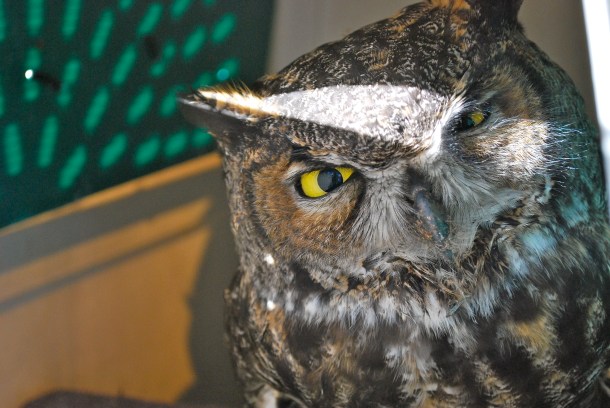
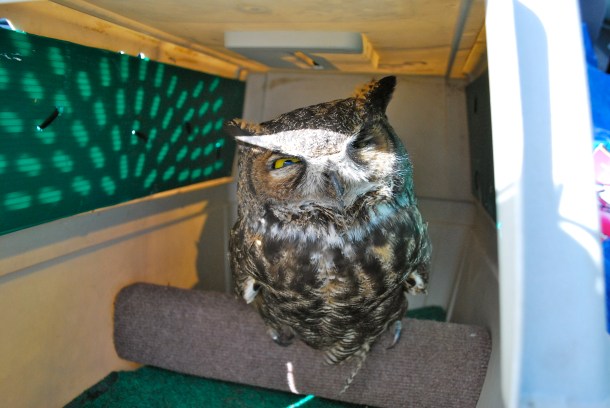
My trio of muscovy ducks only produced one duckling this year, and it was a drake. He ate very well for a few months, but the air is growing chilly now and there’s no need to overwinter two big drakes. It was time to harvest him.

I got two great big breast steaks and two nice legs, around five pounds of meat total. Normally I give the feet to the dog, but this year I wanted to see if I could use them. Duck feet are full of collagen and make excellent stock, but it’s best to remove the outer layer of dirty skin before dropping them into your stock pot. It’s actually a fairly simple process.

DSC_0006.JPGDSC_0007.JPG

Rinse off and scrub the feet if they are very muddy, and bring a pot of water to a boil. Submerge the feet for one minute, or until the skin begins to flake off when rubbed. You’ll only be removing a very thin layer, much like a snake shedding their skin. It will smell slightly fishy and the feet will tense up a bit.

DSC_0010.JPG

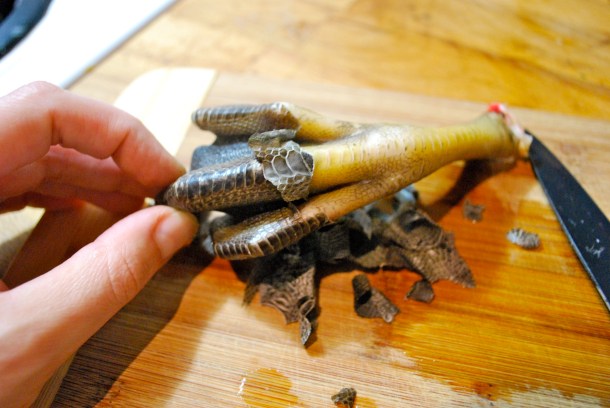
Then just peel away. It’s easiest to do while the feet are still hot. Soon you’ll have a little pile of flaky skin and some nice, clean duck feet. Sometimes the outer nail covering comes off as well, but in this case his nails stayed intact. Now they’re ready to pop into the freezer for the next time I make a big pot of bone broth. Can’t wait!

DSC_0011.JPG

Opal’s Latest Litter

DSC_0004.jpg

This little litter of five are just over three weeks old now. They are one of those exceptionally calm litters of bunnies we occasionally get, and we even had a couple of rare colors show up.

DSC_0011.JPG

Blue otter

I think we might have our very first broken blue otter, I believe all the others turned out to be broken opals in past litters. There is also another stunning solid blue otter, the color that a few families were fighting over last time. The photo makes him/her look a bit washed out but he/she is definitely a blue.

DSC_0025.JPG

Broken blue otter

DSC_0014.JPG

Broken black otter

DSC_0038.JPG

Opal #1

DSC_0043.JPG

Opal #2

I really like the broken black otters, and we got another one this time as well as two opals, one much lighter than the other. If you can believe it, I even noticed the broken blue trying to hump his or her siblings between takes! Three weeks is now officially the youngest I’ve ever seen that happen, by a long shot. I flipped him/her over for a quick check, looks like a doe but a bit early to know for sure. Hopefully!

DSC_0047.JPG

Look at that little face!

These cuties were a pleasure to work with today and enjoyed their first nibbles of fresh greens while waiting to have their pictures taken. This litter will be ready for new homes on November 12th and will make excellent pets.

DSC_0002.JPG

Putting the Bees to Bed for Winter

DSC_0006.JPG

Hive 3, bursting at the seams

Well, today looked like it might be the last nice day for awhile, so I decided to get my hives set up for the cold season. My plan was to move them a couple of feet forward so they would get a little more sun, check for hive health and honey stores, and remove any supers with undrawn comb. Big job!

First I opened my nuc hive. I’ve been a little worried about this hive since the population seems to have dwindled and I sometimes see a wasp go inside. Upon opening them though they seemed like they had pretty solid numbers and I returned the two harvested honey frames I took out in August for them to clean up.

DSC_0010.JPG

The girls carrying out wax debris from the harvested frames

Hive 2, my split hive that kept the original queen was not doing as well as I thought. Here I was thinking they had so much going on that they were overflowing the brood nest into the honey super, when the reality was that their bottom deep hadn’t been touched all year. What the heck ladies? That will teach me not to check. I removed it and left them with one deep and one medium for the winter.

DSC_0004.JPG

Both these hives seemed a bit light to me so I decided to start feeding them. I don’t like to feed if I don’t have to, but I would rather feed than lose hives to starvation. Since it’s fall, they are getting a 2:1 heavy sugar syrup which they will be able to store more quickly since it needs less time to reduce in moisture content.

Then we have Hive 3, the one that requeened itself with feral drones. This hive is like a bee explosion went off inside! All three mediums and one deep totally overflowing with bees. Tons of honey and tons of attitude. Working this hive is like dealing with a lion while the other two hives are pussycats. Once I started taking boxes apart they freaked out and all jumped out at me, letting me know how annoyed they were. I didn’t get stung but it was still pretty intimidating! I decided that this hive didn’t really need to be moved two feet and left it in place to avoid total chaos.

DSC_0007.JPG

It was very interesting to me to see how well this locally queened hive has fared this year. They were the ones with the most disadvantage as they had no queen for weeks after the split. Could their extra defensiveness have anything to do with how well they did? At least I can be fairly confident that this large healthy hive will survive the winter. Of course, it also means that I have to deal with touchier bees in spring. In a way I don’t really mind but I’m not sure I would want to give these genetics to a brand new beekeeper.

DSC_0002.JPG

During my inspections today, I still did not see a single hive beetle, wax moth, varroa mite (alive or dead) or any signs of k-wing disease. I know at the last bee club meeting some people reported tons of mites while others reported none. I hope I’m not being naive in assuming my hives are relatively clean. I didn’t treat for anything this year so we’ll just have to wait and see.

A few last things that need to be done before it gets too cold are to put on entrance reducers with mouse guards and construct some top quilts to control moisture. All easy and quick projects.

Supposedly there is some very nasty weather headed our way over the next few days that is projected to be as bad as the worst storm in recorded history in the Northwest. Wish us all luck!

DSC_0003.JPG

Bird Abatement at the Cemetery

DSC_0056.jpg

One of the jobs our birds of prey have is bird abatement. They work at landfills, airports, vineyards and building sites to move birds like gulls, starlings and geese.

DSC_0004.JPG

Geese in the distance

DSC_0012.JPG

Geese hanging out near Shakespeare’s grave (Enoch Shakespeare, that is)

We recently started a contract working at my local cemetery to move the flocks of Canada Geese that like to loiter all day leaving their slippery little gifts everywhere. Our job is to go in, count the geese, record any of the neck tags we see and then encourage them to move along. This can be done with lasers, dogs, and of course hawks.

DSC_0013.JPG

Getting ready to fly

Today we brought Lulu the female Harris hawk over for our literal wild goose chase. It’s not very hard to convince a group of sixty-seven geese to skedaddle once they see Lulu.

DSC_0017.JPG

DSC_0018.JPG

DSC_0020.JPG

DSC_0033.JPG

DSC_0021.jpg

Lulu can be a bit of a talker

DSC_0036.JPG

The end goal

Pretty much one short flight in their direction was enough to send them packing. We still took Lulu for a walk around the rest of the cemetery so she could enjoy some exercise and look beautiful doing it.

DSC_0049.jpg

DSC_0052.jpg

Harris hawk appropriately atop the gravestone of Harriet Harris

DSC_0060.jpg

DSC_0024.jpg

Lulu going after a toss-up, see the little piece of meat?

DSC_0025.jpg

Got it!

DSC_0030.JPG

There are lots of interesting old tombstones at this cemetery and apparently multiple thousands of people are buried here. Many of the grave markers are very old, and quite a few are for those who died quite young. It’s a beautiful and serene place and I’d like to come back some time with the supplies to do some sketches and stone rubbings.

DSC_0006.JPG

Someone my age who was “killed in the explosion” in 1887. Likely a miner

DSC_0007.JPG

Gravesite of a 12 year old boy who died in 1889

You can see that both of these old grave markers have been reinforced with concrete. That’s because they’re carved from marble which is actually a very soft stone that erodes comparatively quickly in the weather. Nowadays most gravestones are made from granite.

Deformities of Coturnix Quail Chicks

It’s quail hatching time again, and I managed to fill the incubator right before the egg laying season ended. A little late this year, but that’s ok.

When you hatch large numbers of quail chicks you will occasionally get deformities. The chances go up if your incubator conditions were not ideal, or your breeding birds are old.

So far, 82 of my 120 eggs have hatched out and for the most part everyone looks good. There are a couple of chicks with splayed leg, which may or may not resolve itself. This always seems to happen regardless of the fact that I offer a surface with good traction right from hatch.

DSC_0004.JPG

Chick with splayed leg

And there are a couple of chicks with bulging eyes. This also seems to happen every time and I’m not entirely sure why. These chicks look healthy enough for the first few days but in my experience will usually die. You can see in the photos how much larger the eyes are than in a normal chick. It looks very uncomfortable but I always like to give them a fighting chance.

DSC_0011.JPG

DSC_0012.JPG

This chick has bulging eyes

DSC_0017.JPG

Compared to normal eyes in this chick

Today I had a deformity pop up that I’ve never seen before. This little chick has the whole top of their beak twisted into a 90 degree angle from their lower beak. It also seems like they may be missing an eye on the squished side. How on earth did this little bird even get out of the egg?

DSC_0003.JPG

Anyway, with a deformity this severe, you can be pretty confident that this chick would just suffer and eventually die from hunger or thirst, so I euthanized it. Its little body did not go to waste and was happily eaten by chickens to be converted into more eggs.


I Grew the Most Poisonous Plant in the World

DSC_0001.JPG

I like plants, especially unusual ones. This year I started a lot of ornamentals from seed, and one of them was the castor bean plant, which has been designated by the Guinness Book of World Records as the most poisonous plant in the world.

DSC_0005.jpg

The danger comes from the seeds, which contain a protein called ricin. It only takes about three seeds taken orally to kill a human adult. Of course, it’s also the source of castor oil which is used medicinally for many things.

DSC_0003.JPG

It might be a killer, but this plant is also highly interesting to look at. It’s sensitive to frost, so acts like an annual in this climate and grows extremely quickly, forming gigantic red and green leaves, small flowers and spiky seed clusters. I have one plant in the ground which will probably die back soon, but I also planted one in a pot so I could bring it inside and try to keep it alive over the winter. Should be interesting.

Owl Rescue

DSC_0001.JPG

I was lucky enough to get sent out on an owl rescue call today, where I captured this adorable little guy. He’s a fully-grown, great-horned owl.

He is very underweight and seems to have had head trauma, as one of his eyes is not looking or working right. Fortunately both his wings seem to be in good flapping order and he was pretty alert and took a tidbit of quail from me.

DSC_0002.JPG

We gave him some fluids and some pain relief and he will be allowed to recuperate in a warm enclosure. Hopefully he’ll make it through the first 24 hours and start eating and recovering soon!

(Update: Sadly his head trauma was too severe and this little guy had to be humanely euthanized. Sorry little buddy.)

My Best Boys

IMG_5060.JPG

Here you can see my amazing boyfriend manning the amazing Harris’ hawk, Paco!

Paco is one of my favorite birds at the Centre, he has such a gentle and curious personality and loves to make small talk with me. I was so happy to introduce him to a human I also care deeply about! Are these a couple of cool boys or what?

New Kayak!

DSC_0057.JPG

I have boats on the brain today!

I’ve always wanted a kayak, but even more so after my boyfriend introduced me to ocean kayaking a few years back. He has a pair of SOT (sit-on-top) kayaks that we enjoyed using for sightseeing, short journeys out to nearby islands and rockhounding along the shore. However he’s once again back up north, this time taking position of editor for a paper in Inuvik, NWT. I miss him already!

So it was finally time to get my own!

I initially had my sights set on basically the same kayak my boyfriend has, an eMotion around 6-8 feet long. Too bad it’s nearly impossible to find this brand in BC, but there are some models by other companies that are very similar. I had also read in a few places that these smaller kayaks can be shoved into the back of a hatchback, which is exactly what I planned to try.

I wanted something suitable for fishing, since if I’m out on the water alone I know I won’t be able to resist. There are a wide range of fishing kayaks on the market, but they are all in drab colors and outfitted with more fancy gear than I think I need. I want something small, light, uncomplicated and with room to bring the dog who probably loves boating more than I do.

DSC_0061.JPG

I decided to settle on the Perception Tribe 9.5 in sunset. I would have preferred another color, but this was the only one in this model they had left. That’s ok, I like the high visibility of the yellow/orange/red and since it’s nearly September, the new kayak shipments won’t be in until February. If I want any paddling this season it was this little boat or nothing!

I really like the stability, self-draining and unsinkableness of the SOTs. You can easily swim off them, stand upright on them and take them in quite rough ocean. This one can hold 300 pounds and weighing only 46 pounds I can just manage to carry it myself.

I also picked up a fiberglass paddle, lifejacket, floating tow line (regulation), a pair of neoprene shorts, a paddle leash and a fishing rod mount that I will install myself.

It turns out this 9.5 foot boat CAN be shoved into the back of a hatchback, which is great, but I’m hoping to rig up a foam and strap system to put it on the roof, as having it in the car restricts visibility a bit. I’ve done the research and I know I can secure it safely.

Now where to go first??

DSC_0068.JPG