Hybrid Bunnies Silvering Up

DSC_0006.JPG

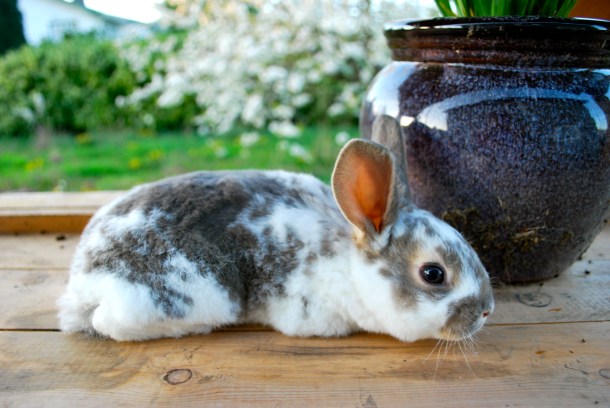
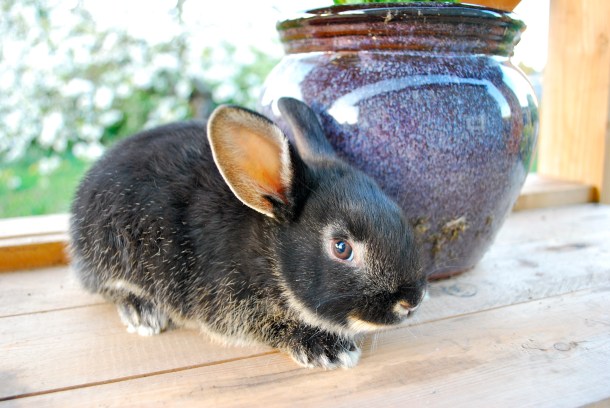
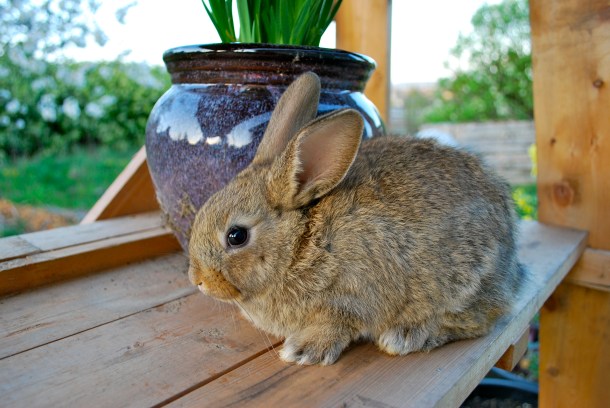
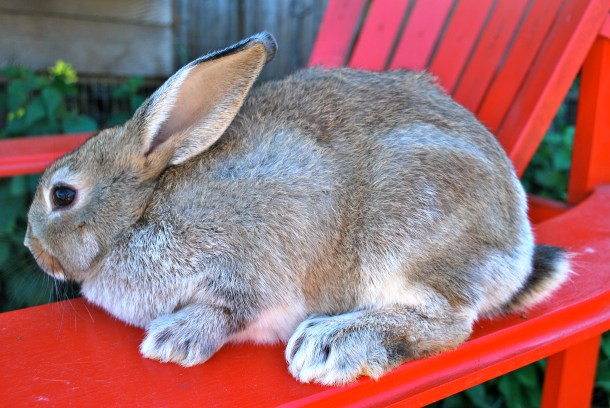
This boy was all brown a week ago

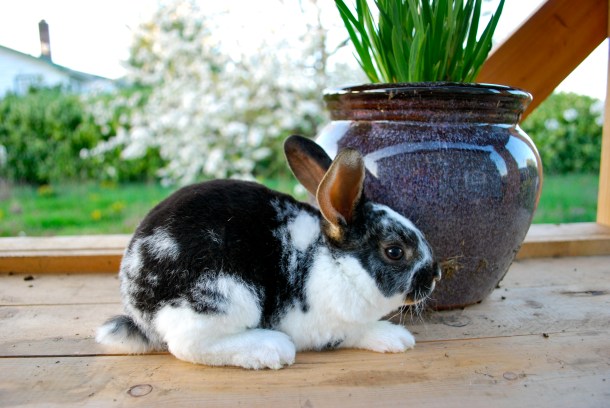
Well lo and behold, the addition of a Champagne d’Argent stud has led to some pretty serious silvering in the offspring!

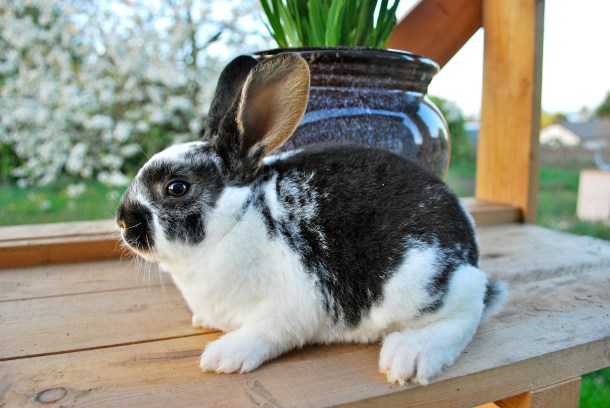
We got some very cute silvered black hybrids who had their ticking from day one resembling Silver Martens, and have recently begun to lighten up even more. Most of the blacks have sold due to their impossible cuteness but a couple of bucks remain. The real surprise is all the chestnut agouti buns that are starting to look a little snow-covered. How sweet!

DSC_0008.JPG

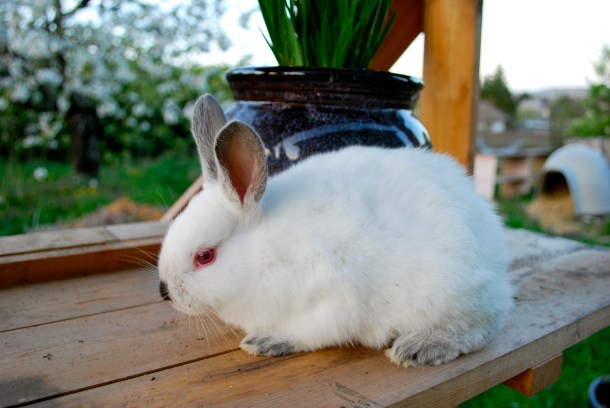
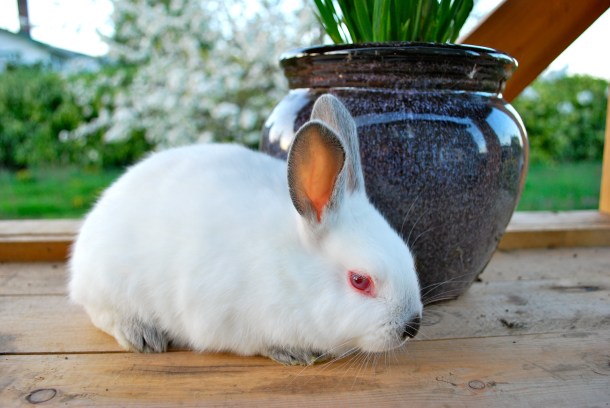
Ears have already turned white on this little buck

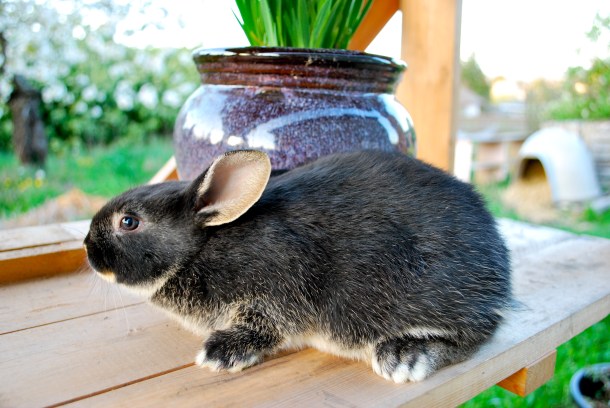
Oddly, only Caraway’s kits are showing silvering, she is my Creme/Rex hybrid so her kits are a mix of three breeds. Her mother’s kits which are half Creme and half Champagne do not show any silvering yet and may not at all.

DSC_0010.jpg

I have to say that I find the coloration to be quite lovely, and I expect these agouti buns to end up quite frosty-looking with a brown head and undertones. A bit like an Arctic hare changing from their summer to winter coats.

Installing My First Nuc

DSC_0005.JPG

Well today turned out nicer than expected, albeit a bit windy, so I decided to install my nuc. I didn’t want them to get too crowded in there as I know they work fast!

DSC_0002.JPG

I got my brand new smoker lit for the first time with some pieces of burlap, and pried off the nuc lid. Since there are only four frames in the nuc box, but room for five, the bees have already started drawing out comb in the empty space. These combs were just tiny nubbins when I picked up the nuc two days ago, so you can see just how quickly they are constructed. Aren’t they elegant looking?

DSC_0007.JPG

DSC_0012.JPG

DSC_0013.JPG

The next thing to do was to remove the little nails that were holding the frames in place so they wouldn’t shift during travel. Easily done with a pair of pliers. Then it was just a matter of carefully removing the four frames and installing them in the center of the new hive, in the same order that they were removed from the nuc.

DSC_0011.JPG

DSC_0012.JPG

All frames transferred

While removing the frames, I did a quick inspection of each one. It was tough to see well because of all the bees, but I was able to identify some capped brood and some drone comb, as well as some drones. I couldn’t locate the queen, and I’m not going to worry about that too much right off the bat. I didn’t see her in the box after the frames were gone so I assume she made it in on a frame.

DSC_0013.JPG

These stragglers all eventually found their way inside

DSC_0014.JPG
After installing the frames, I mixed up a 50/50 sugar water solution and installed a feeder inside another deep box on top of the inside cover. This will help the bees draw out all the comb on the new frames which so far only have foundation.

DSC_0001.JPGDSC_0002.jpg

So that’s it! The first nuc is installed and the bees now have lots of room to build. I did wear my veil for the installation but I didn’t wear my gloves. I don’t think the veil was even really necessary and I don’t really like how it obscures my view of the bees. I may try without it next time. I wasn’t stung at all today and the only damage was a very minor burn on a baby finger from the smoker. It’s hot!

DSC_0005.JPG

All done!


Even More Bees

DSC_0003.jpg

Today I went on a little excursion to pick up my second colony of bees, a complete three box mature hive with drawn comb and a brand new queen. They were purchased from an 85 year old German beekeeper who after 60 years of keeping bees has decided to retire. I went a bit early to observe the banding of the hives in order to get them ready to transport, and I was able to get some photos of the process.

DSC_0006.JPG

DSC_0010.JPG

I feel really privileged to be able to take over this hive of bees from such a seasoned keeper, and even more lucky that he has offered to mentor me on an ongoing basis if needed. He is quite close by and has many years of bee knowledge under his belt.

DSC_0004.JPG

My hive is the third one from the left in the above photo, with the brick on top.

DSC_0007.JPG

So it looks like I officially have all my starter bees! As it was cloudy today, I decided not to hive my nuc yet and will wait until the next sunny day which should be Thursday. I learned a lot today and can’t wait to dig into my new hive and check it all out! Thank you so much to the other volunteer beekeepers who helped me get it home!

Bees Settling In

DSC_0021.JPG

I took the foam block out of the entrance last night after the bees had settled for an hour, as instructed. They were mad! They came boiling out ready to deal with whatever had been vibrating and bouncing them all over the place an hour earlier. I decided to back off and let them calm down. It began to rain lightly so I covered the top of the nuc with a board and called it a night.

DSC_0020.JPG

The next morning I went to check on them and they were busy at work, flying in and out of the nuc like they had always lived here, packing little orange, yellow and white pollen balls on their little legs. Adorable! A few bees came in completely covered in orange dust, and the beekeeper I bought them from mentioned that those bees have been into the scotch broom. Well I’m glad they like it because we sure have plenty of it on the island!

DSC_0017.JPG

DSC_0022.jpg

Parsley cat is not too sure what to make of this!

My First Bees!

DSC_0001.JPG

The selection of nucs for sale

I drove three hours today to pick up my very first nuc of bees not far outside of Victoria. Boy am I excited!

DSC_0006.JPG

Close up of some of the nucs

The gentleman who sold them to me was very knowledgeable and told me he’s been keeping bees since 1974. Apparently he used to work for a large apiary in southern California for over 27 years. I was glad he knew what he was doing, as I didn’t ask many questions before committing to the trek. He was also kind enough to allow me to snap a few photos.

DSC_0002.JPG

The main apiary

I needn’t have worried, as he had a nice little selection of nucs that were made from his strongest overwintered hives. He was on a good varroa treatment schedule using oxalic acid and thymol which he explained to me. He recommended the oxalic treatment during the winter when there is less brood (since the treatment can’t penetrate the cells) and the thymol treatment around the end of August after the honey harvest. (Thymol needs hot weather to work).

He said that he breeds for honey production, colony strength and gentleness. He admitted he doesn’t breed for hygienic bees per se, but that his colonies were all very strong and so he might as well be. (Hygienic selective bred  bees  are much better at keeping themselves clean of varroa mites.)

DSC_0004.JPG

DSC_0005.JPG

DSC_0007.JPG

DSC_0008.JPG

Opening up my nuc

He showed me his active hives and then got out the smoker to show me the nuc. It’s a four frame that is positively chock full of hard working little ladies. It must weigh about 30 pounds. He secured the four frames to one side with two nails to avoid shifting, and the top was nailed on as well. The entrance was sealed with a little block of foam. Once I got them home I was advised to allow them to sit for an hour to let them settle, and then remove the foam. Since it was dark when I arrived home, I will wait to do the transfer into the hive until tomorrow.

DSC_0012.JPG

DSC_0013.JPGDSC_0014.JPG

DSC_0019.JPG

Finally home!

I also have a lead on a full, three box complete hive with bees and drawn comb for a good price, and I think I may pick it up so I have two hives to compare. I’ll keep you posted!

Two More Beehives

DSC_0006.JPG

It’s official, I have bee fever. Yet I still do not have a single bee tenant.

Of course, I am still on the waiting list for a nuc and I have also signed up for the local swarm retrieval list, even despite having zero experience. A friendly neighborhood beekeeper has promised to alert me if there is an easily accessible swarm reported in my area, and that he will come and show me the ropes and even let me keep the bees! Fingers crossed.

In the meantime I have purchased two more hot wax dipped hives to match my first one, and I have set them all up in the dappled sunshine under my wild cherry tree facing south east. I have also applied lemongrass oil swarm lure to them just in case any scout bees happen along.

DSC_0005.JPG

I have also stocked up on deep and medium supers and frames to fill them, since as I understand it when you need one you need it now. I have also acquired a bee smoker and found plans to build myself a couple of simple wooden nuc boxes for the future. Wish me luck!


New Wood Chipper

I was joking around in a previous post about how hard it is to find cheap wood chips around here this year, and how I was pretty close to buying my own wood chipper and putting up an ad for tree services!

DSC_0002.JPG

Well it turns out that is exactly what has happened. Today I bought myself a used chipper and soon I will be pestering neighbors for their tree trimmings. Can’t wait!

Bees!

DSC_0005.JPG

Well, no actual bees yet, but my order for a nuc (nucleus of bees) has been put in and should be ready for pickup in a few weeks. (A nucleus is a box containing a few frames of worker bees and a queen, kind of like a mini hive.)

What I do have is my very first beehive!

I’ve wanted to start raising bees ever since I got my own property, and was pleased to note that my city allows up to three hives per urban lot. I’ve been busy for a few years getting the rabbits, chickens and other creatures coming along, and I decided this year it was time to start the bee adventure.

I’ve been a member of the local beekeeping club for a couple of years now, and this weekend there was supposed to be a beginner beekeeper’s course hosted by them that I signed up for. Sadly there was not enough interest and the course was cancelled. Since my entry fee was refunded, I decided to use it to buy my first hive.

DSC_0007.JPG

My starter hive is a Langstroth, obtained from Flying Dutchman in Nanaimo. It consists of a slanted bottom board to keep out rain, a deep brood box filled with ten waxed plastic frames, an entry reducer bar, an inner cover, and an outer telescoping cover topped with sheet metal.  All the wooden parts have been hot wax dipped at the factory, so no paint or other finish is required.

I also picked up a hat with veil (veil not pictured), and some gloves. I already have a hive tool, so I should have everything I need to be ready for my first bees. I will be buying or making another deep brood box and a medium honey super in the next few weeks, so I’ll be prepared if everything proceeds as planned and my bees need more space.

I often say I’m excited on this blog but this time I am REALLY excited! Stay tuned for more bee news!


Bunny Update

DSC_0004.JPG

Broken blue otter Rex buck

The babies are now a little over a month old and looking very cute. They are eating piles of fresh wild forage each day from our little organic field, which has really been taking off. They hardly eat any pellets at all, and I find this makes them extra healthy and friendly as they look forward to their daily greens.

I did a quick once over and so far it seems like all the bunnies I picked out for the shoot today are bucks except for the little Californian at the end. The photos represent all the colors we have in the current four litters. I have multiple chestnut agouti kits as well as the ticked black. Enjoy!

DSC_0002.JPG

Broken blue otter Rex buck, right side

DSC_0009.JPG

Broken black otter Rex buck

DSC_0014.JPG

Broken black otter Rex, left side

DSC_0017.JPG

Opal Rex buck

DSC_0021.JPG

Opal Rex buck, left side

DSC_0026.JPG

Creme/Rex/Champagne buck

DSC_0023.JPG

Creme/Rex/Champagne buck, left side

DSC_0032.JPG

Chestnut agouti Creme/Champagne buck

DSC_0034.JPG

Chestnut agouti Creme/Champagne buck, right side

DSC_0036.JPG

Californian doe

DSC_0041.JPG

Californian doe, right side


A Visit to Petroglyph Park

DSC_0039.JPG

Although I only live a few minutes away, I’ve never been to visit this little park until today. Despite being a gorgeous sunny day, my dog and I were the only visitors, which is just how we like it.

DSC_0017.JPG

This park has been described by many online as “disappointing”. To be sure, it is small, surrounded on all sides by housing developments and the highway, and the “modern” petroglyphs are beginning to take over, see below:

DSC_0033.jpg

Pretty sure this one was carved recently

The original petroglyphs can be hard to make out, since they have become overgrown with moss and debris. Here is the main frieze as it looks today, but the individual images are hard to distinguish.

DSC_0014.JPG

Here’s an image taken from the internet of how they looked when the site was freshly prepared:

11970165325_dfd7c562e0_c.jpg

A little more impressive! It’s interesting to think that so close to my home, Salish people were here carving these images into sandstone over 1000 years ago.

DSC_0034.JPG

Two headed bird?

One of my favorite parts of the visit were the dozens of pink and purple fairy slipper orchids that I saw everywhere. I’ve never seen this variety in the wild before and they were exceedingly charming. Apparently the corms used to be a food source for native peoples.

DSC_0012.JPG

I also saw a few white trilliums, a flower that always reminds me of my childhood back east, where the woodlands behind my house were wall to wall carpeted with them every spring. Sadly, Google Maps reveals that most of that magical forest is cut down now to make way for housing developments.

DSC_0002.jpg

One of the best things about this miniature park is that not too far in and up and you are treated to this pretty breathtaking view:

DSC_0025.JPG

Definitely worth a visit!